

Shopify Integration

Shopify App Installation Guide
Follow these comprehensive steps to install and configure the official eAWB Shopify app. Seamlessly integrate eAWB's shipping services directly into your Shopify store and automate your entire shipping process.
Video Tutorial
Watch this step-by-step video guide to help you through the integration process
Prepare Your Accounts
Ensure you have admin access to both platforms
Make sure you are logged in as admin in both your Shopify store and your eAWB account. You need administrative privileges on both platforms to complete the integration successfully.
Important
Without admin access on both platforms, you will not be able to complete the installation and configuration process.
Access the Official eAWB Shopify App
Install the app from Shopify App Store
Visit the Shopify App Store to install the official eAWB Shopify app. Our app is specifically designed for seamless Shopify integration with all Romanian carriers.
📱 Install eAWB Shopify App
Click Install Button
Start the installation process
On the Shopify App Store page, click the Install button located on the left side of the screen to begin the installation process for your Shopify store.
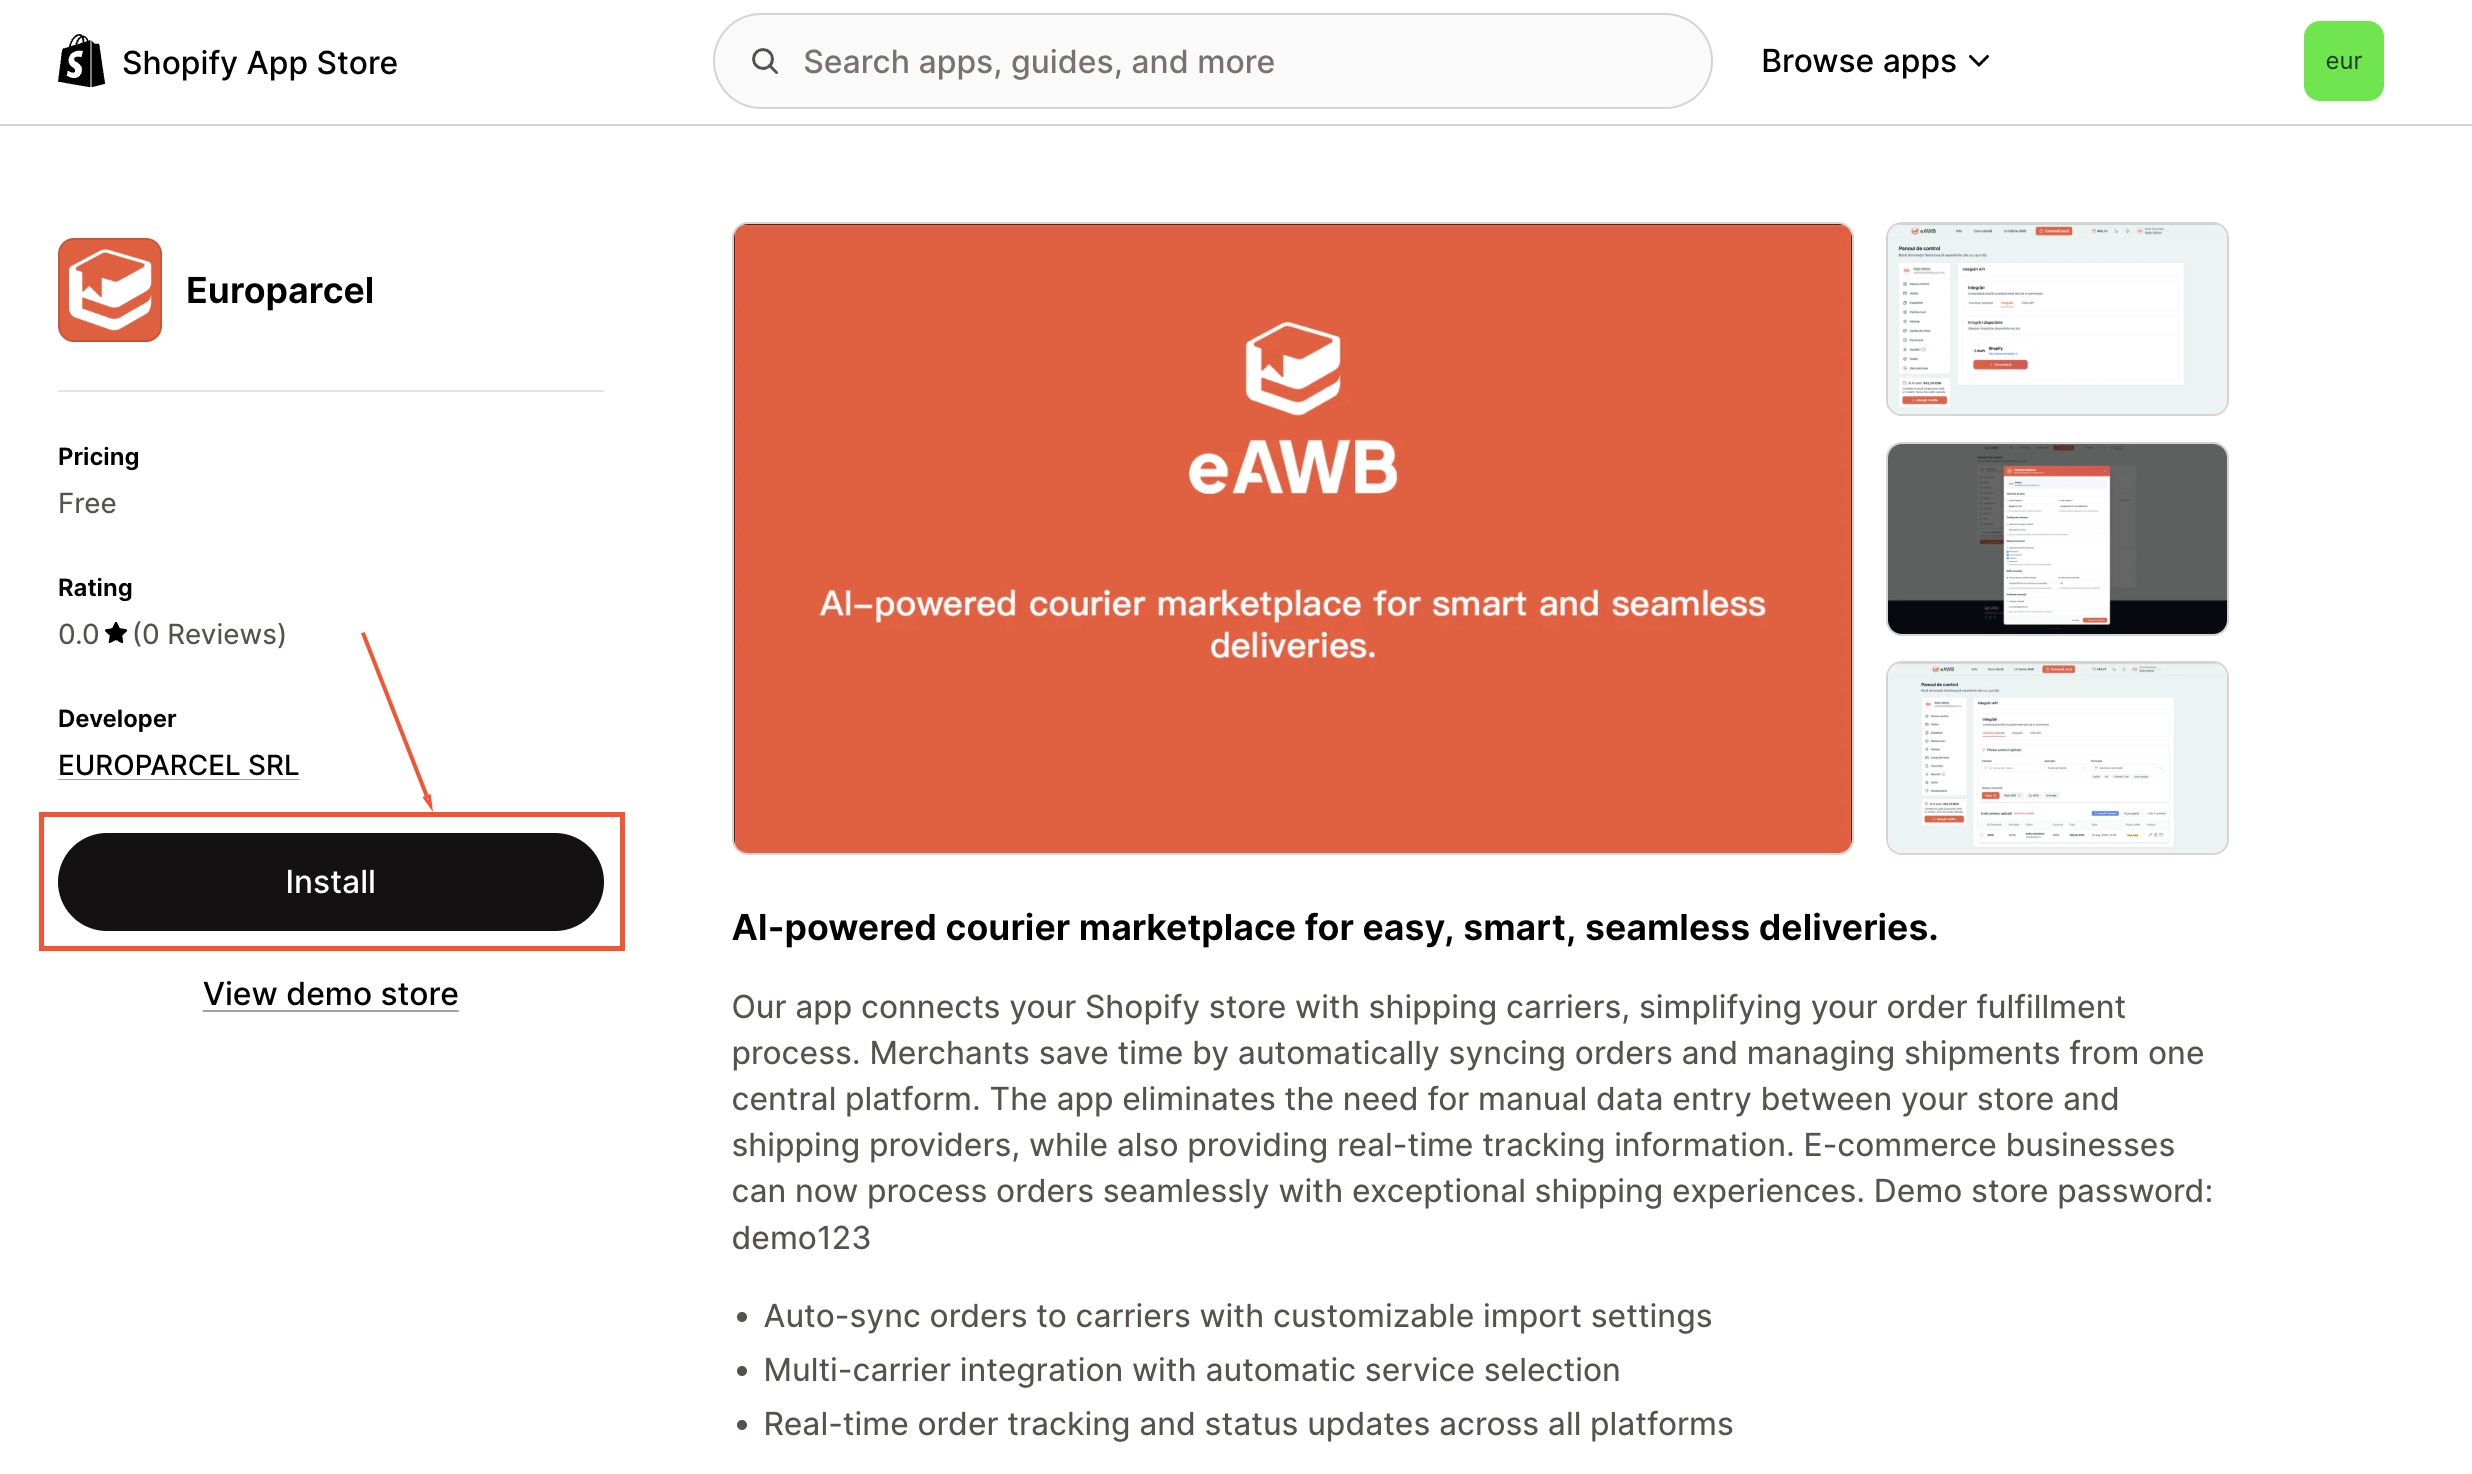
Click the Install button to proceed
Tip
Make sure you are logged into the correct Shopify store before clicking install.
Accept App Permissions
Grant eAWB access to your store data
Review and accept the permissions requested by eAWB to access your orders, products, and customer information. Click the Install app button to grant the necessary permissions.
Review the permissions eAWB is requesting
Ensure you're logged in as an administrator on your Shopify store
Click Install app to grant access
Wait for the installation to complete
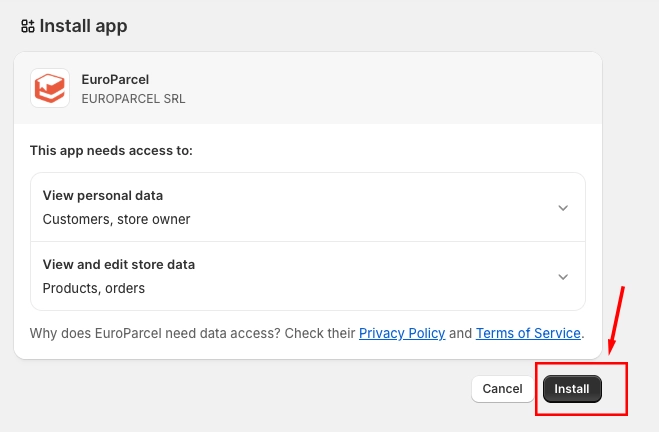
Accept permissions for eAWB integration
Important
It is mandatory to accept the terms and conditions to complete the integration.
Access Integration Settings
Configure your eAWB integration
After installation, you will be redirected to your eAWB account. Navigate to the Integrări section, then click on the Integrări tab and click Setări (Settings) next to your new Shopify integration.
Click Setări (Settings) to configure your integration
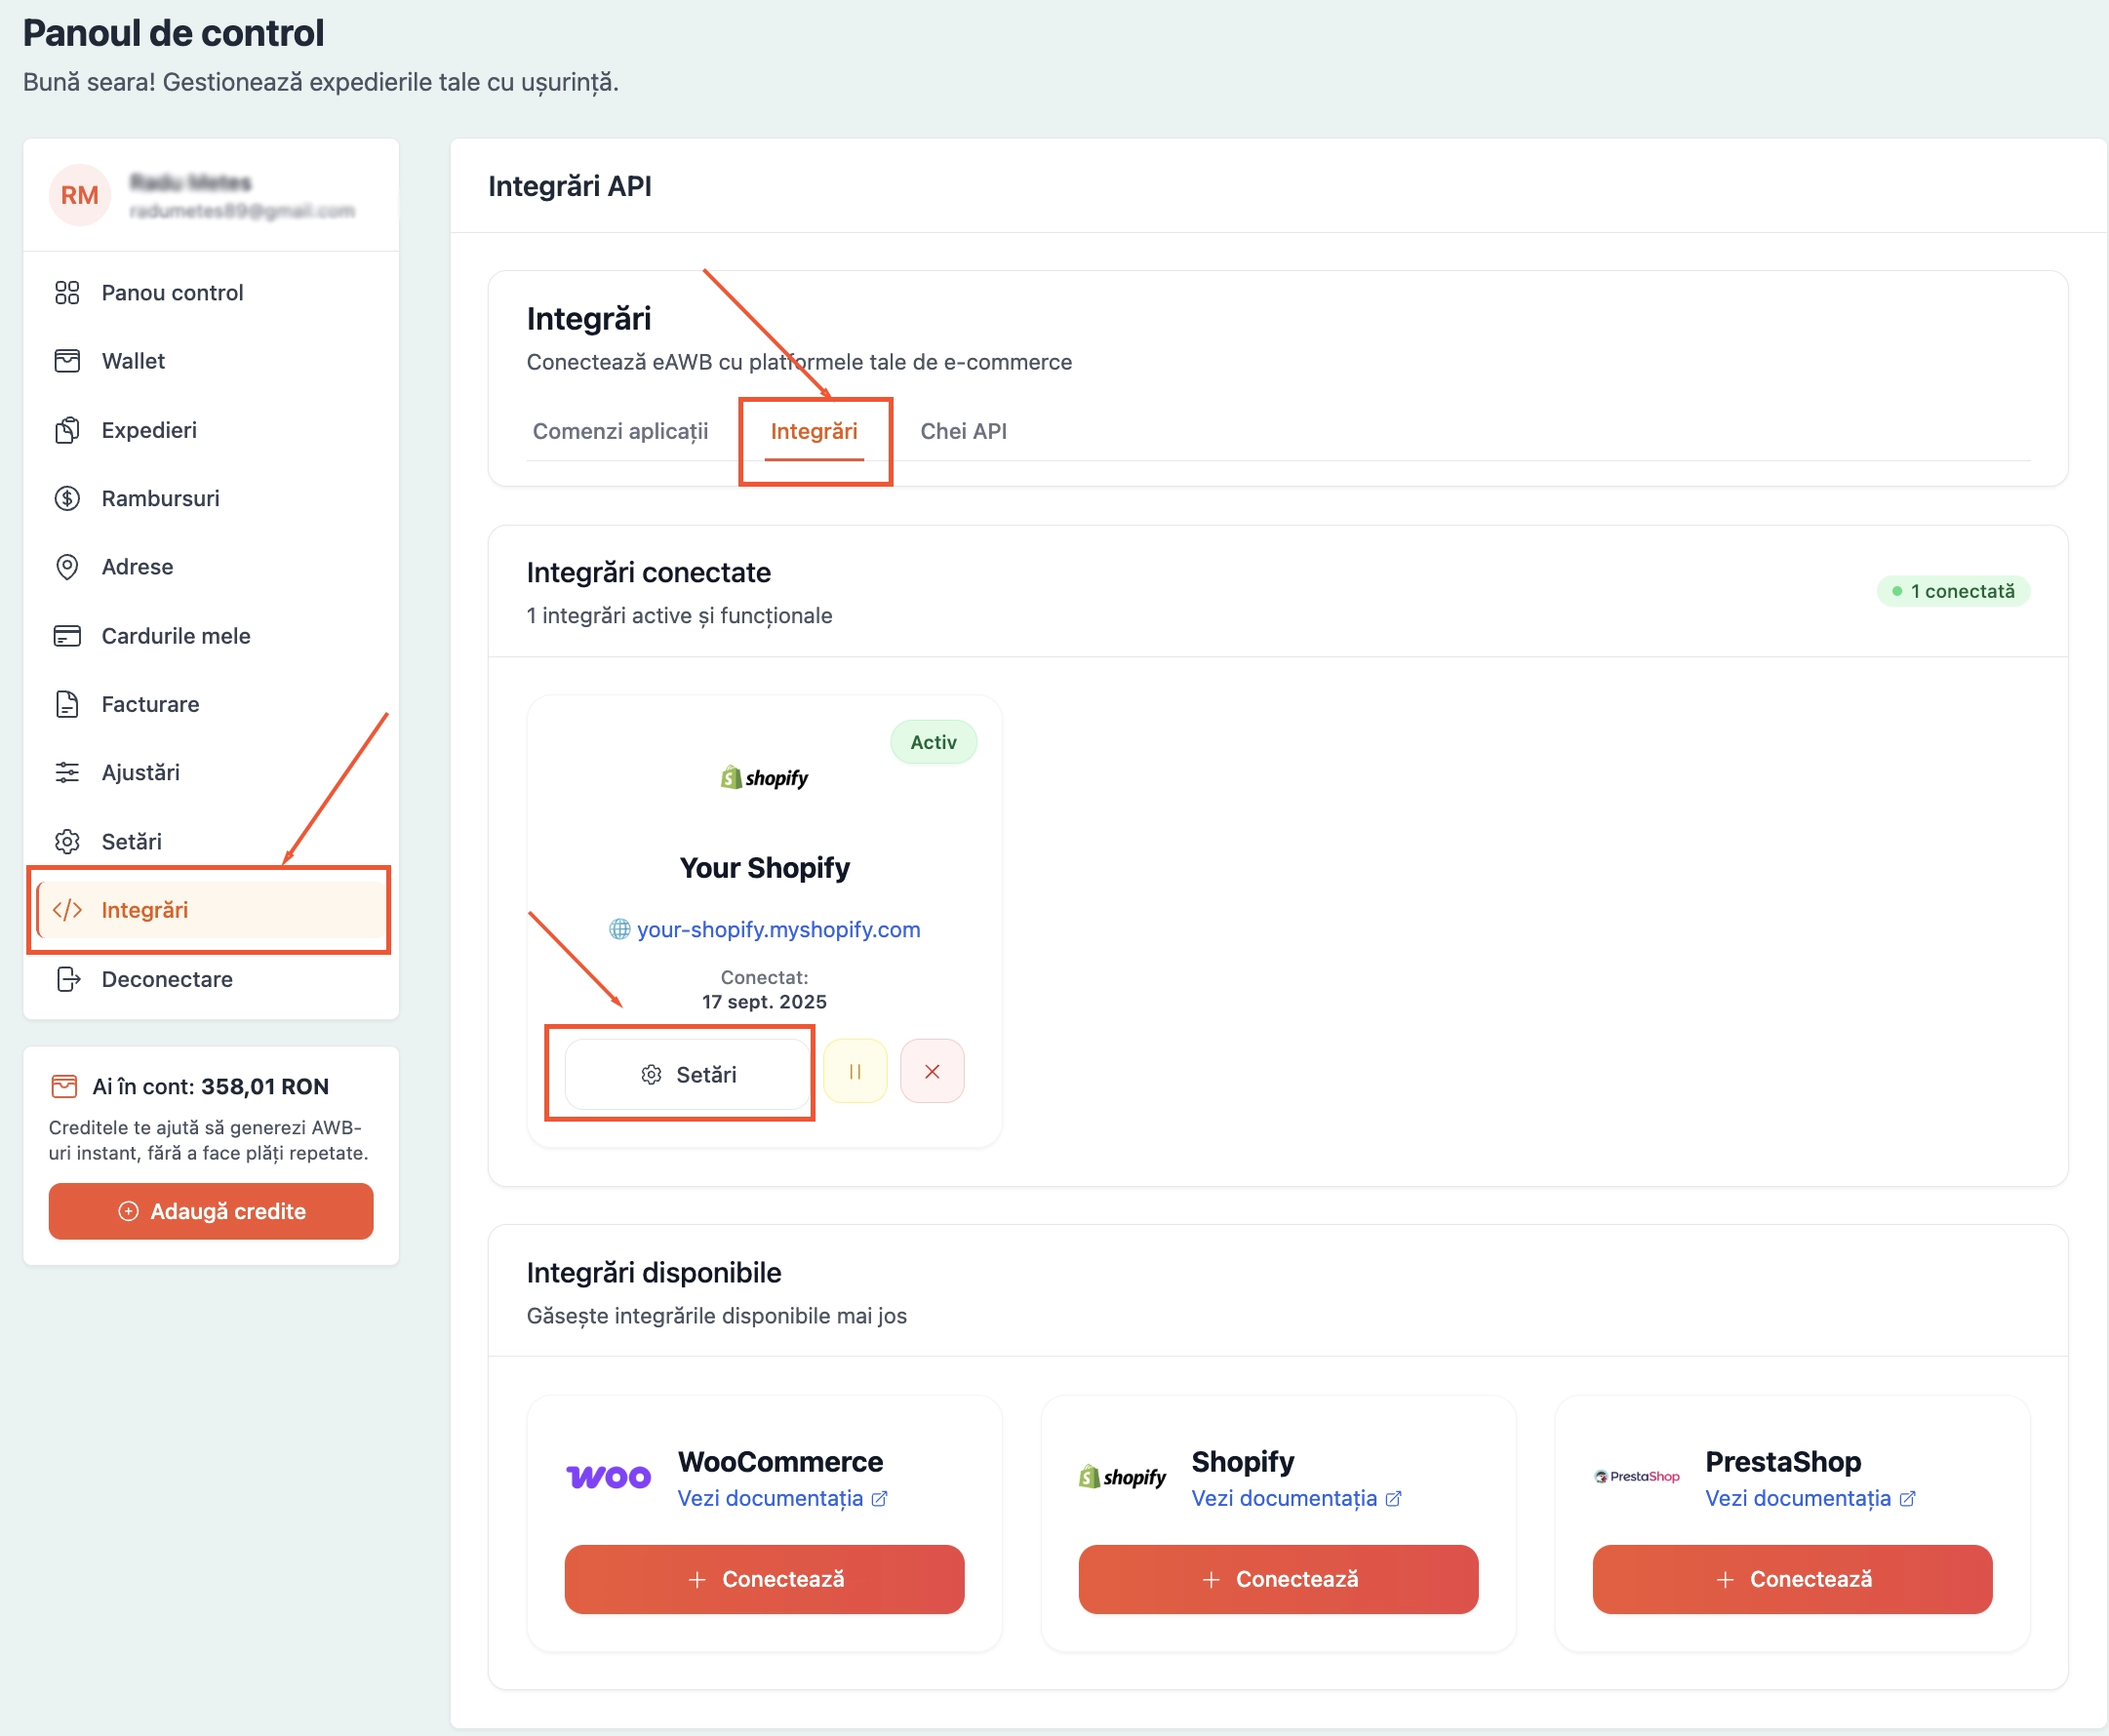
Access integration settings in eAWB
Customize Integration Name
Set a descriptive name for your integration
In the integration settings, you can edit the integration name to something more descriptive that helps you identify this specific Shopify store connection.
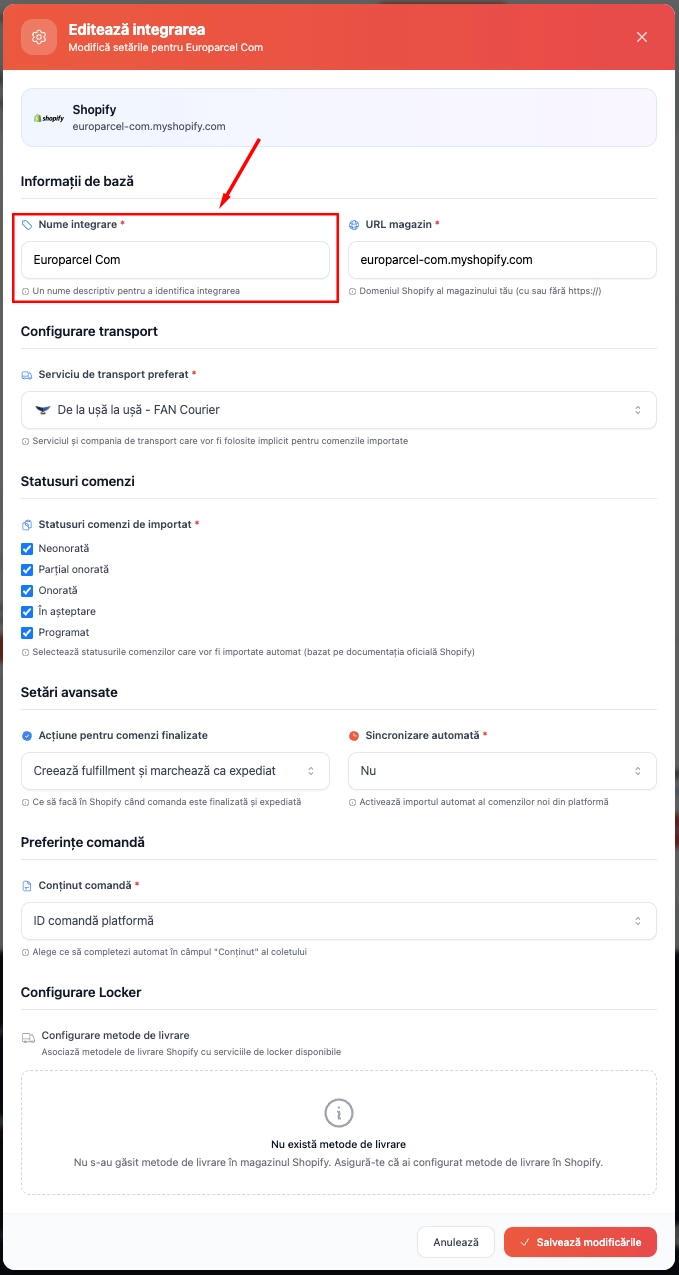
Customize your integration name
Select Preferred Carrier
Choose your default shipping carrier
Configure your preferred carrier from the available options. This will be used as the default carrier for order processing, and you can change this per order.
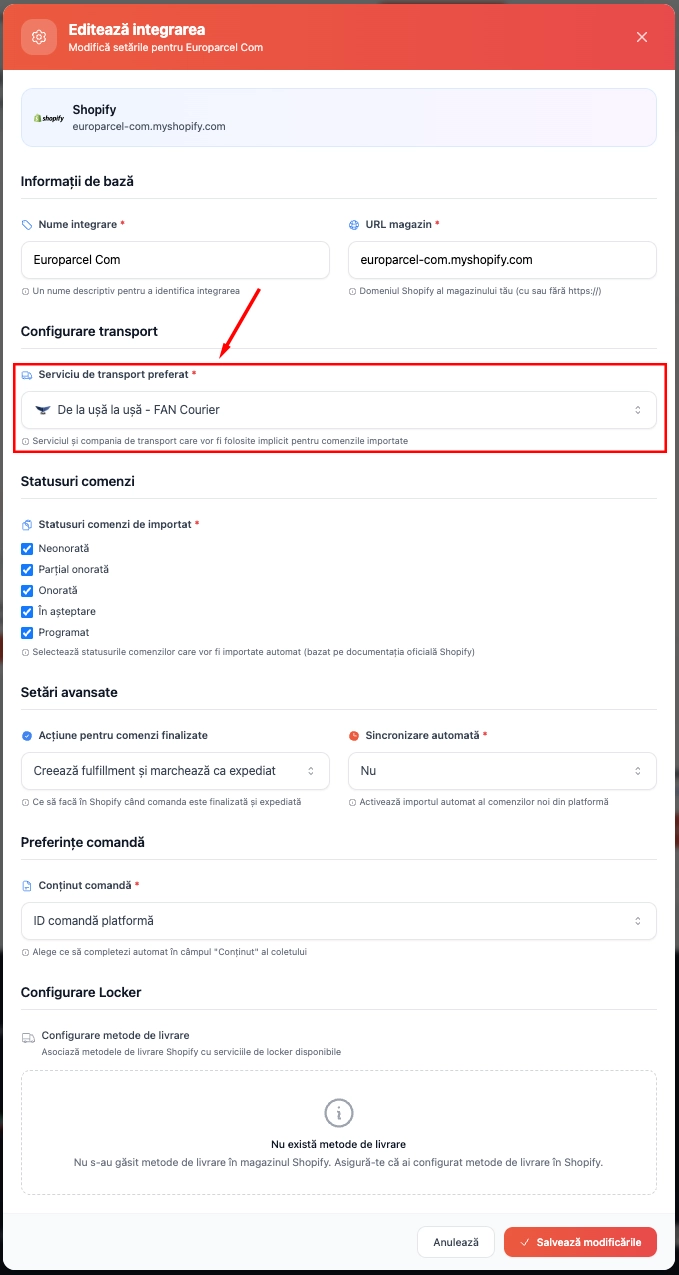
Choose your default carrier service
Configure Order Import Settings
Select which order statuses to import
Choose which order statuses you want to automatically import from your Shopify store. This determines which orders will be processed for shipping through eAWB.
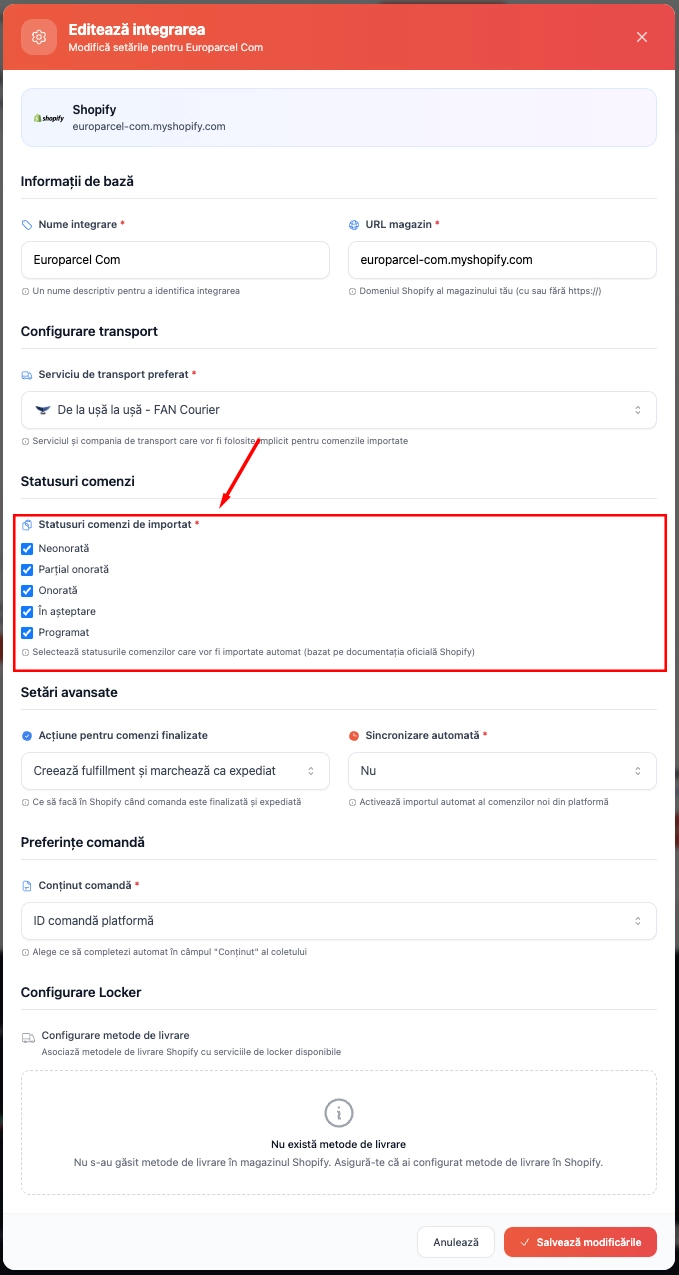
Select order statuses to import
Set Completion Actions
Define actions for completed orders
Configure the Acțiune pentru comenzi finalizate (Action for completed orders) setting. This determines what happens to orders in your Shopify store when they are successfully shipped.
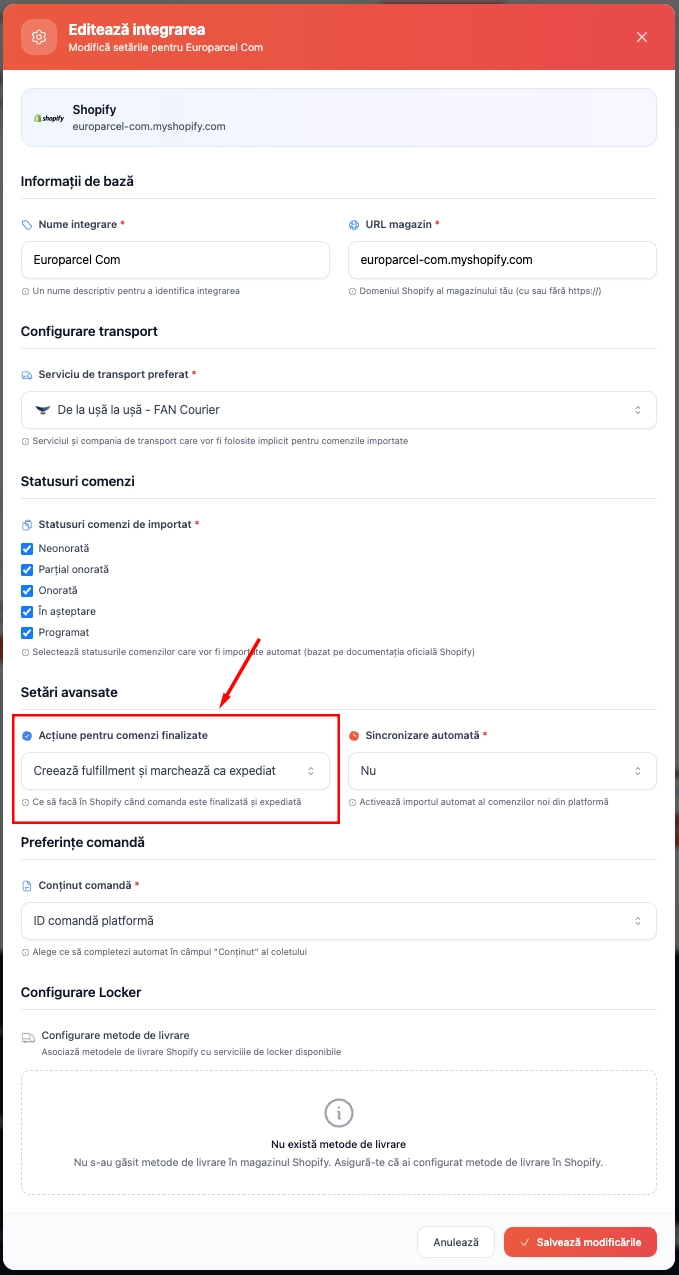
Configure completion actions
Enable Automatic Synchronization
Configure automatic order import
Enable Sincronizare automată (Automatic synchronization) if you want eAWB to automatically import new orders from your Shopify store based on the configured status criteria.
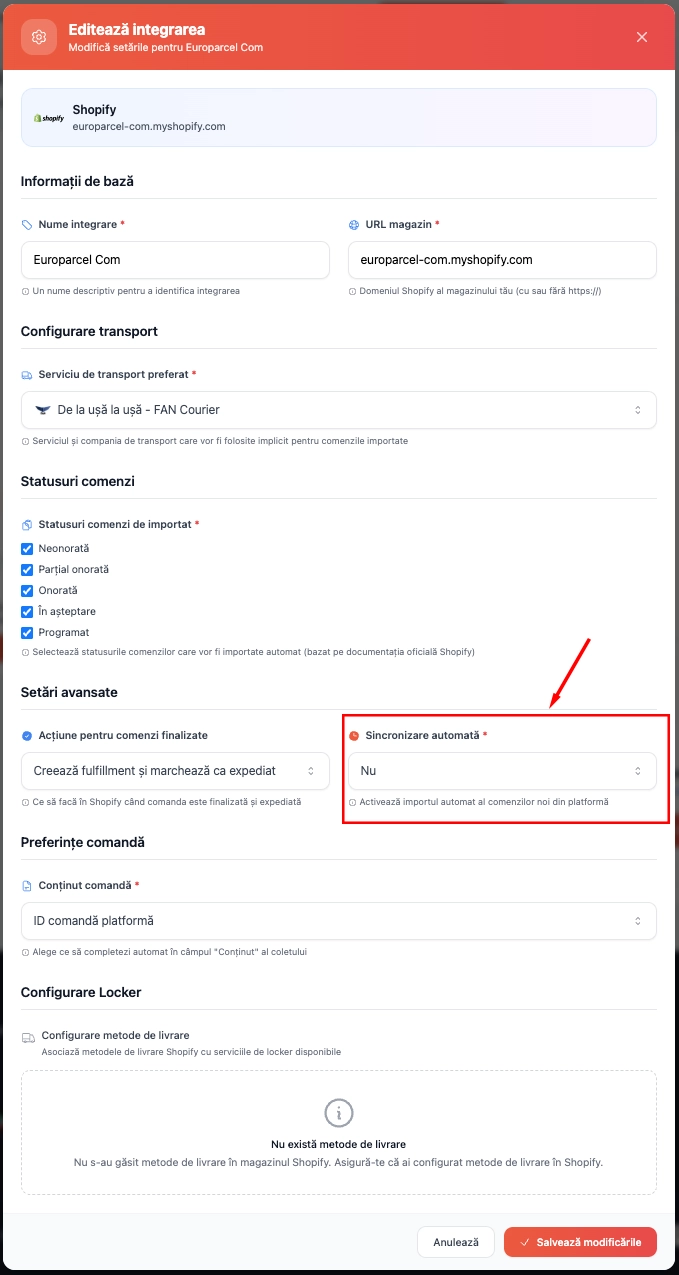
Enable automatic order import
Tip
Automatic synchronization saves time and ensures no orders are missed, but you can also manually control the import process if preferred.
Configure Order Content Settings
Set up waybill content preferences
Configure the Conținut comandă (Order content) settings to determine what information appears on your shipping waybills and how product information is handled.
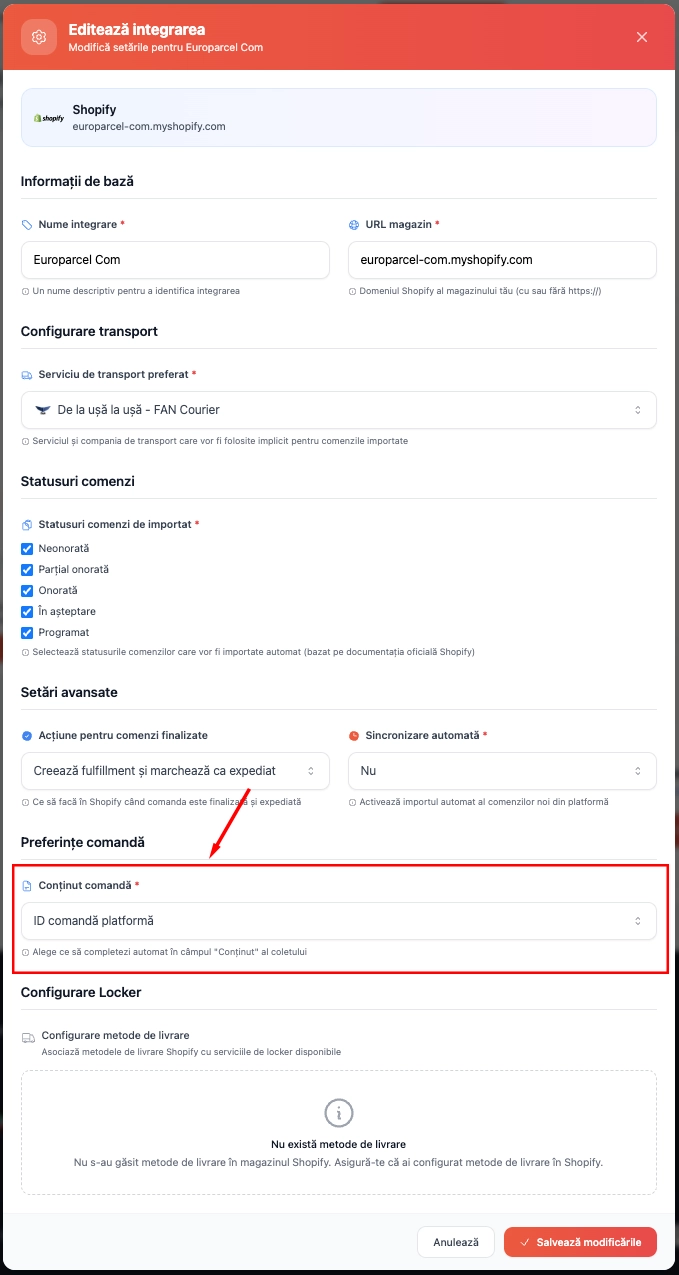
Configure waybill content settings
Configure Locker Services
Select lockers for your shipping methods
Select the locker services you want to show for your shipping methods. Associate your Shopify shipping methods with the available locker delivery options from carriers like Sameday (easybox), Cargus (Ship & Go), FAN Courier (FANbox), and DPD.
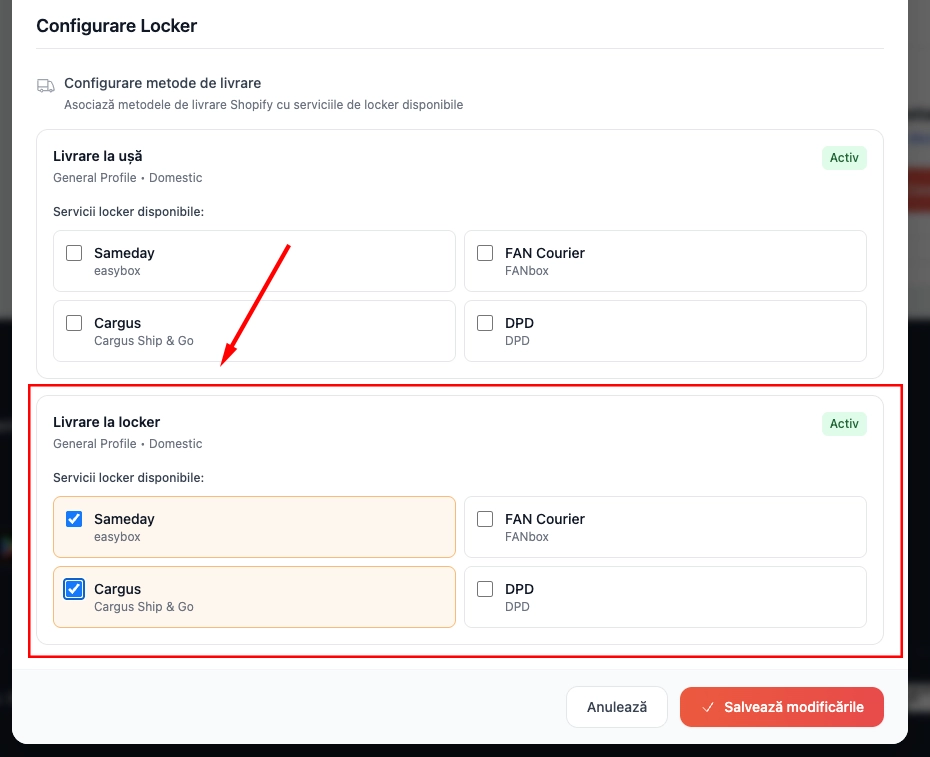
Select locker services for shipping methods
Save Configuration
Complete the integration setup
Save all your configuration settings by clicking Salvează modificările (Save changes). Your Shopify store is now fully integrated with eAWB and ready to process orders automatically.
Click Salvează modificările (Save Changes) to save all settings
Verify that all configurations are correct before saving
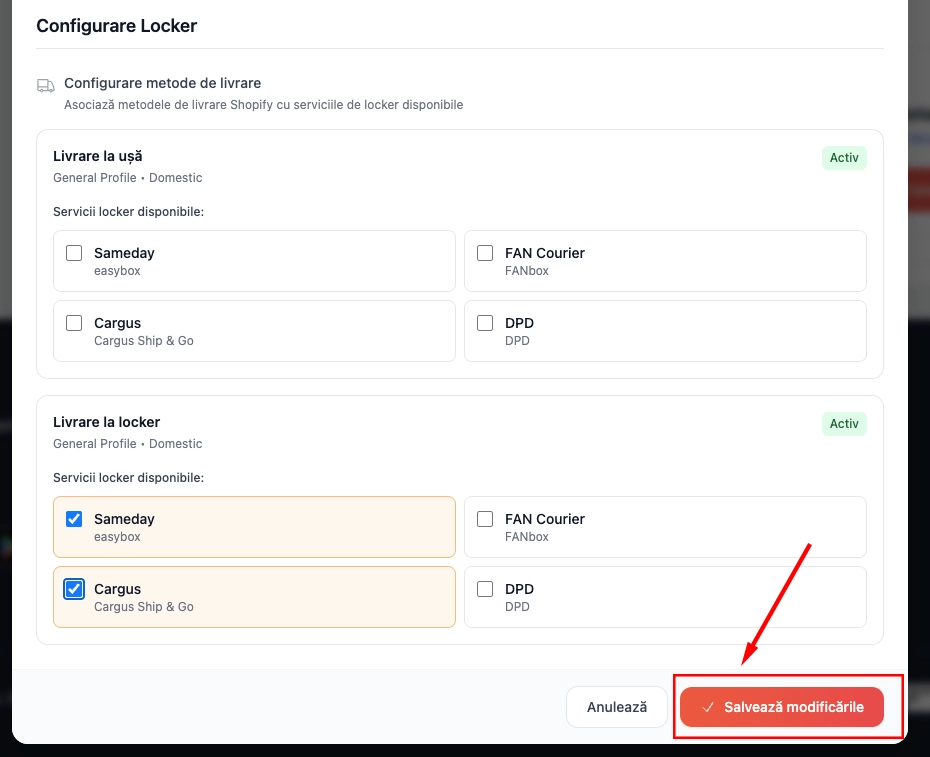
Complete the setup process
Tip
The following steps will configure locker selection on your Shopify checkout pages.
Access Store Settings
Navigate to your Shopify admin settings
Now configure locker selection for your checkout pages. Go to your Shopify store admin and click on Settings in the bottom left corner of the dashboard.
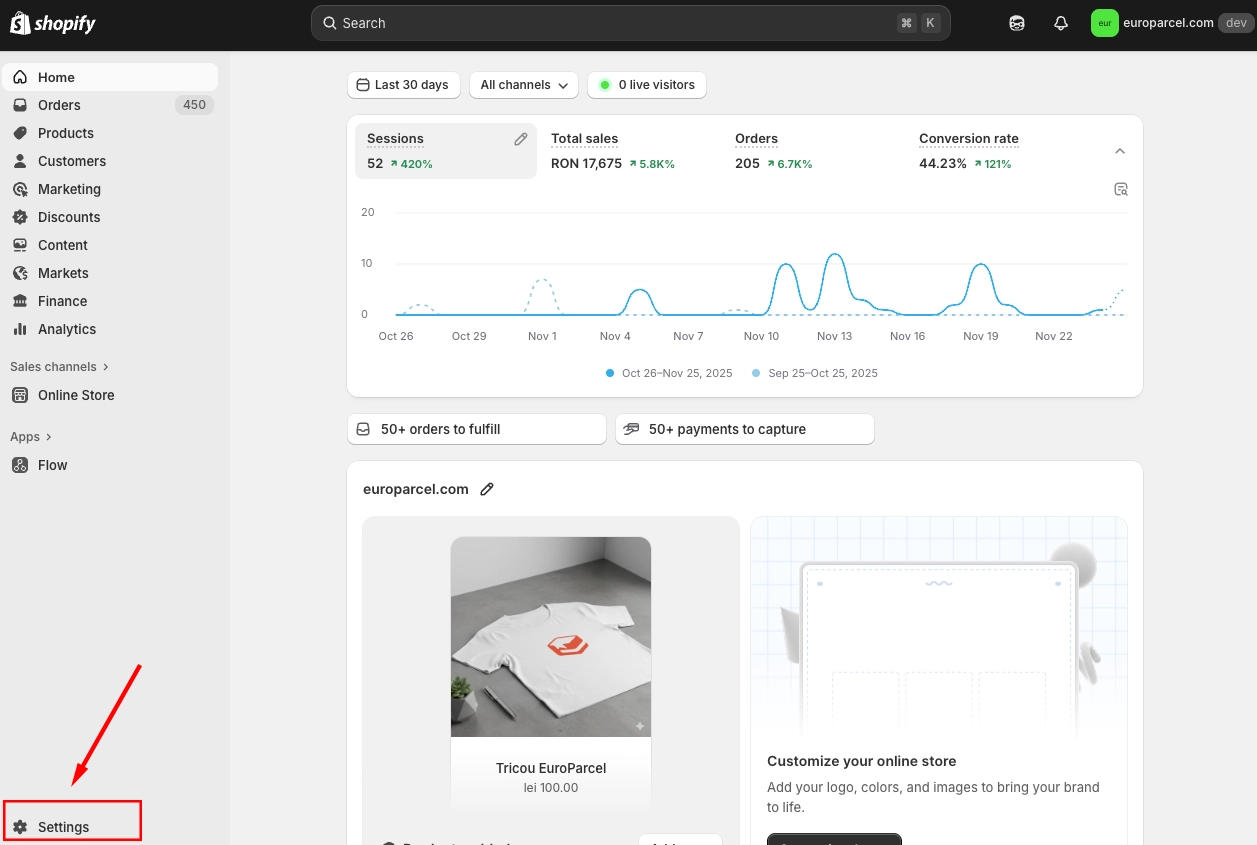
Access your store settings
Navigate to Checkout Customization
Access the checkout editor
In the Settings menu, go to Checkout and click Customise to open the checkout editor.
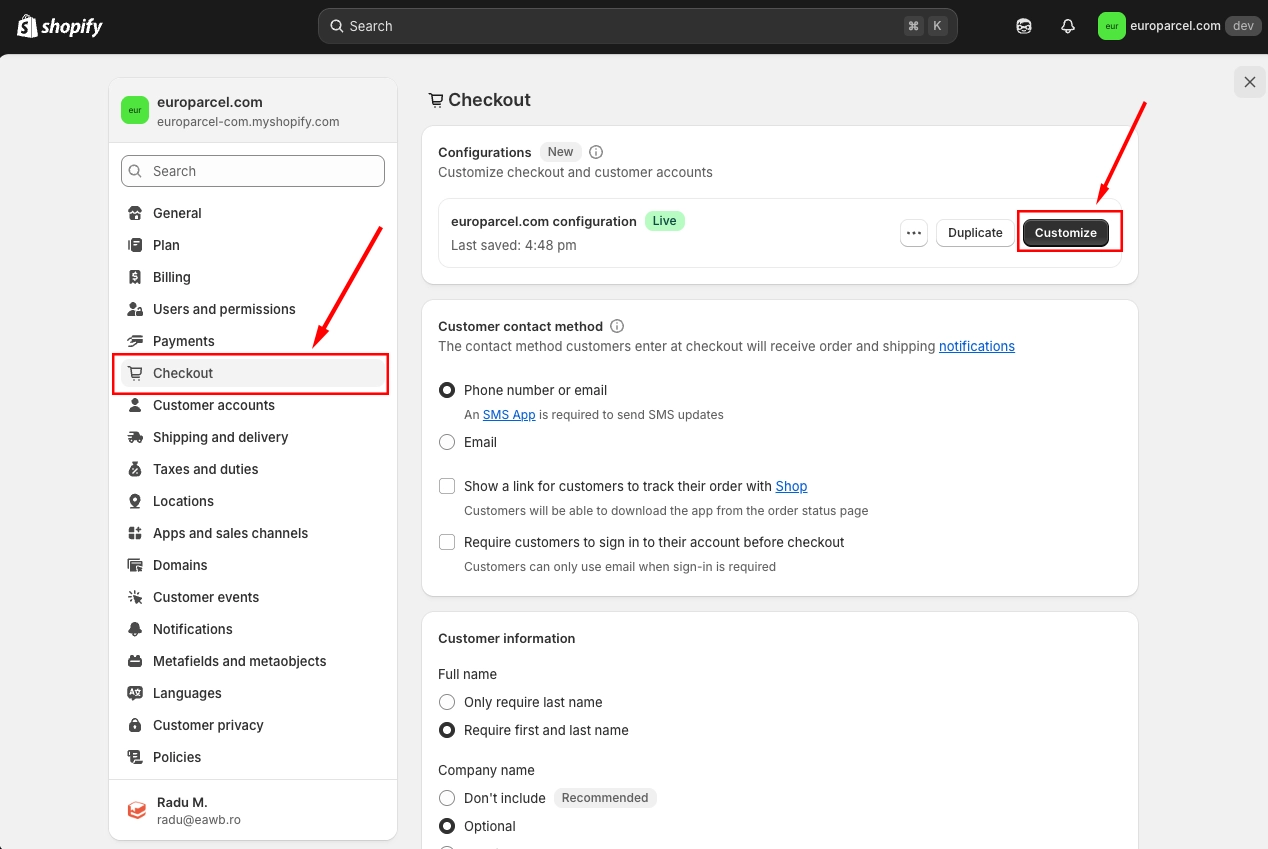
Open the checkout customization editor
Open Apps Menu
Access the apps section in the editor
In the checkout editor, go to Apps menu.
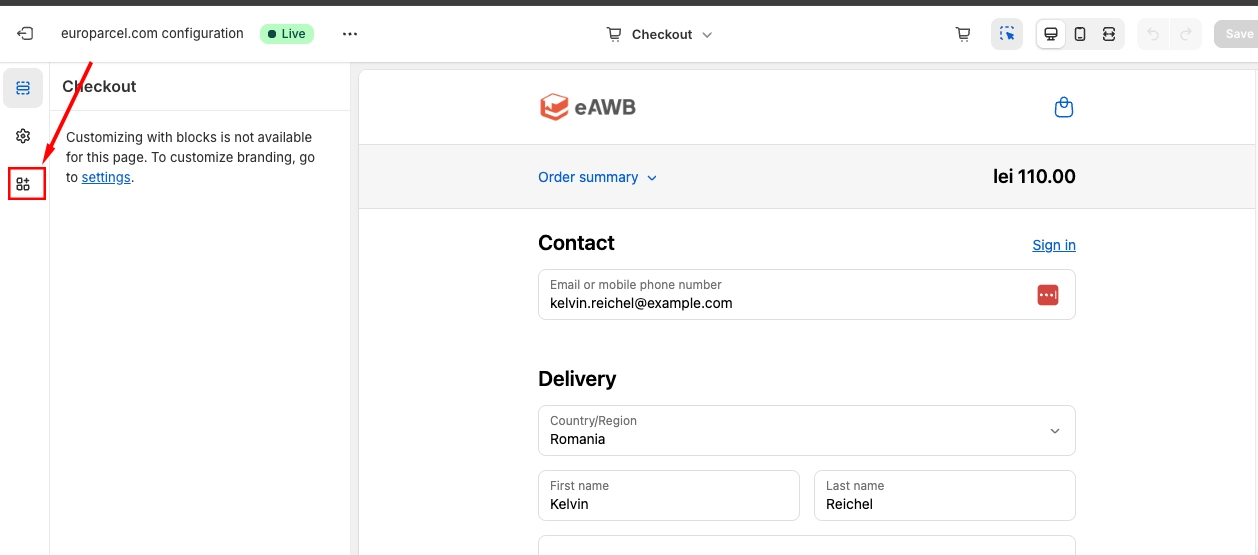
Open the Apps menu in the editor
Select Thank You Page
Choose Thank You page for locker selection
Click the + button on eAWB Locker Selection and select Thank you from the dropdown menu.
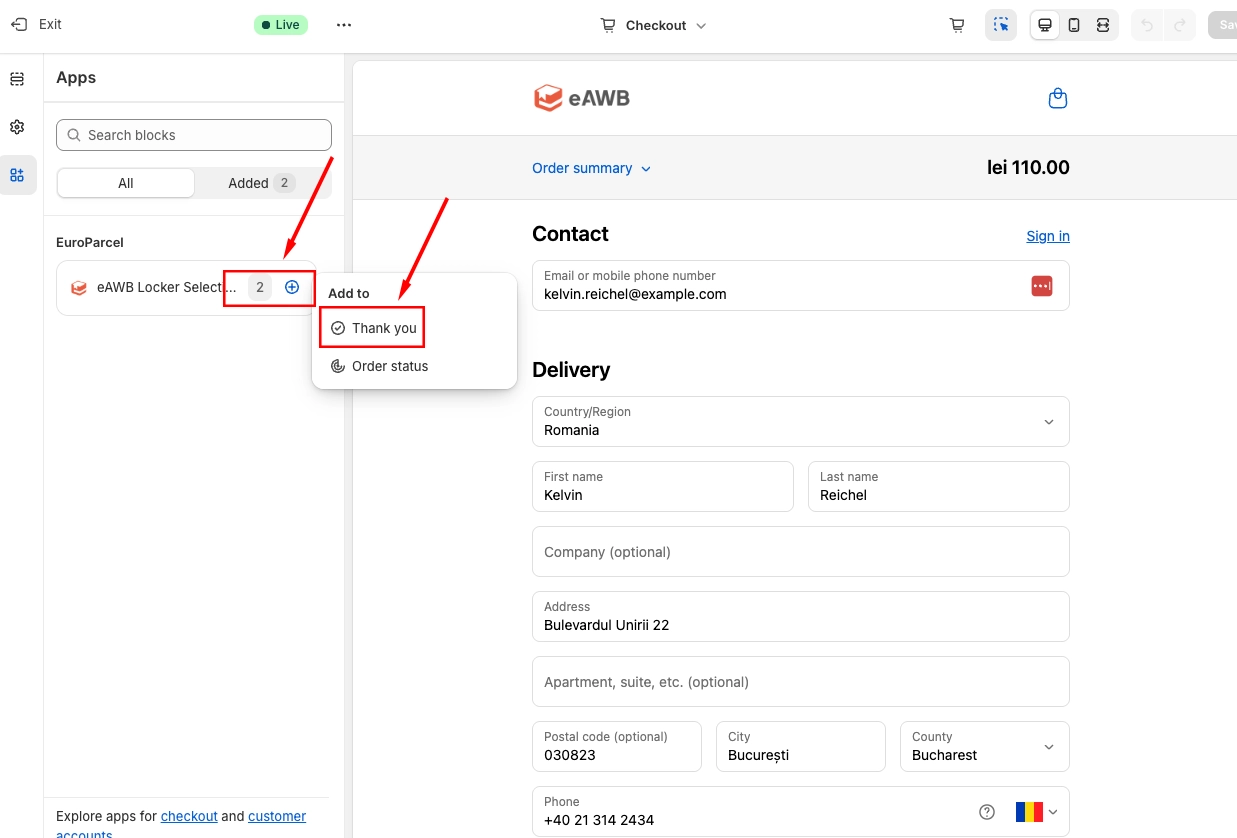
Click + and select Thank you page
Save Thank You Page Configuration
Place the extension and save
Place the eAWB Locker Selection component on the Thank You page and click Save to apply the changes.
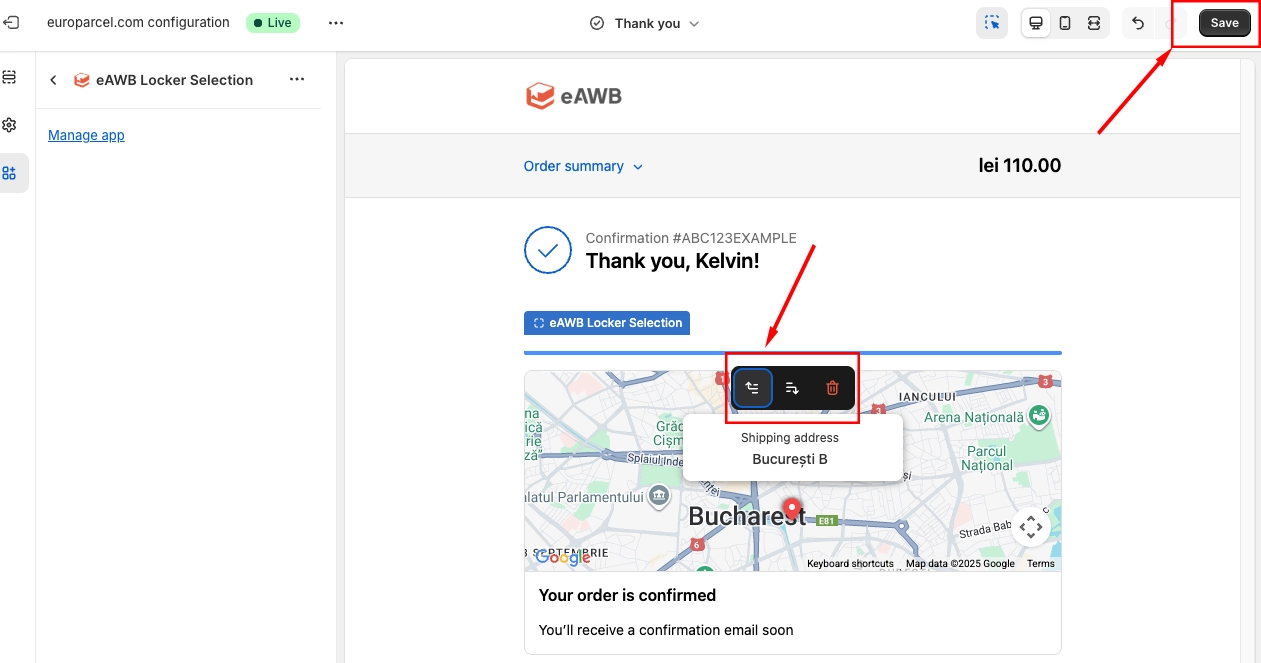
Place the extension and save
Add Extension for Order Status
Click + to add locker selection for order status
Click the + button again on eAWB Locker Selection and select Order Status page to add the extension there.
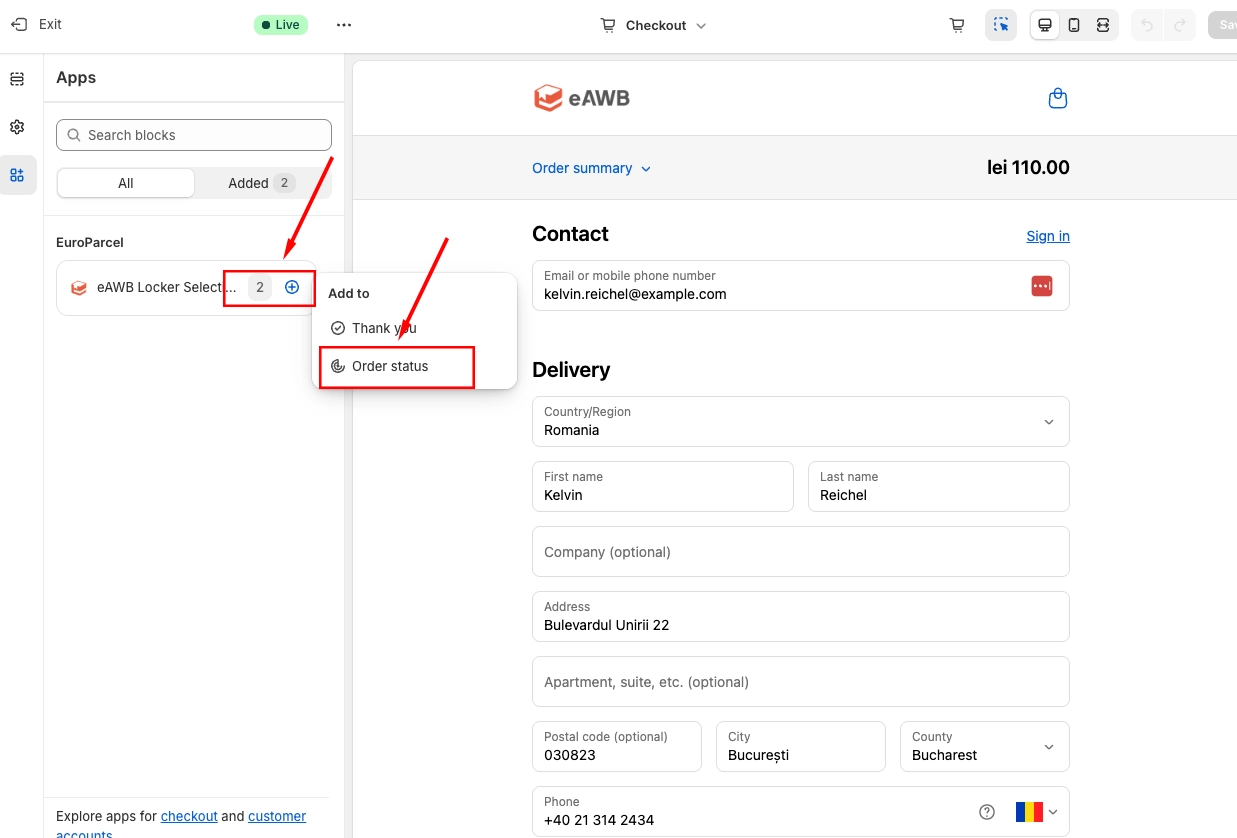
Click + and select Order Status page
Save Order Status Configuration
Complete the order status page setup
Add the eAWB Locker Selection component to a visible part of the Order Status Page and click Save so customers can view their locker delivery information when checking their order status.
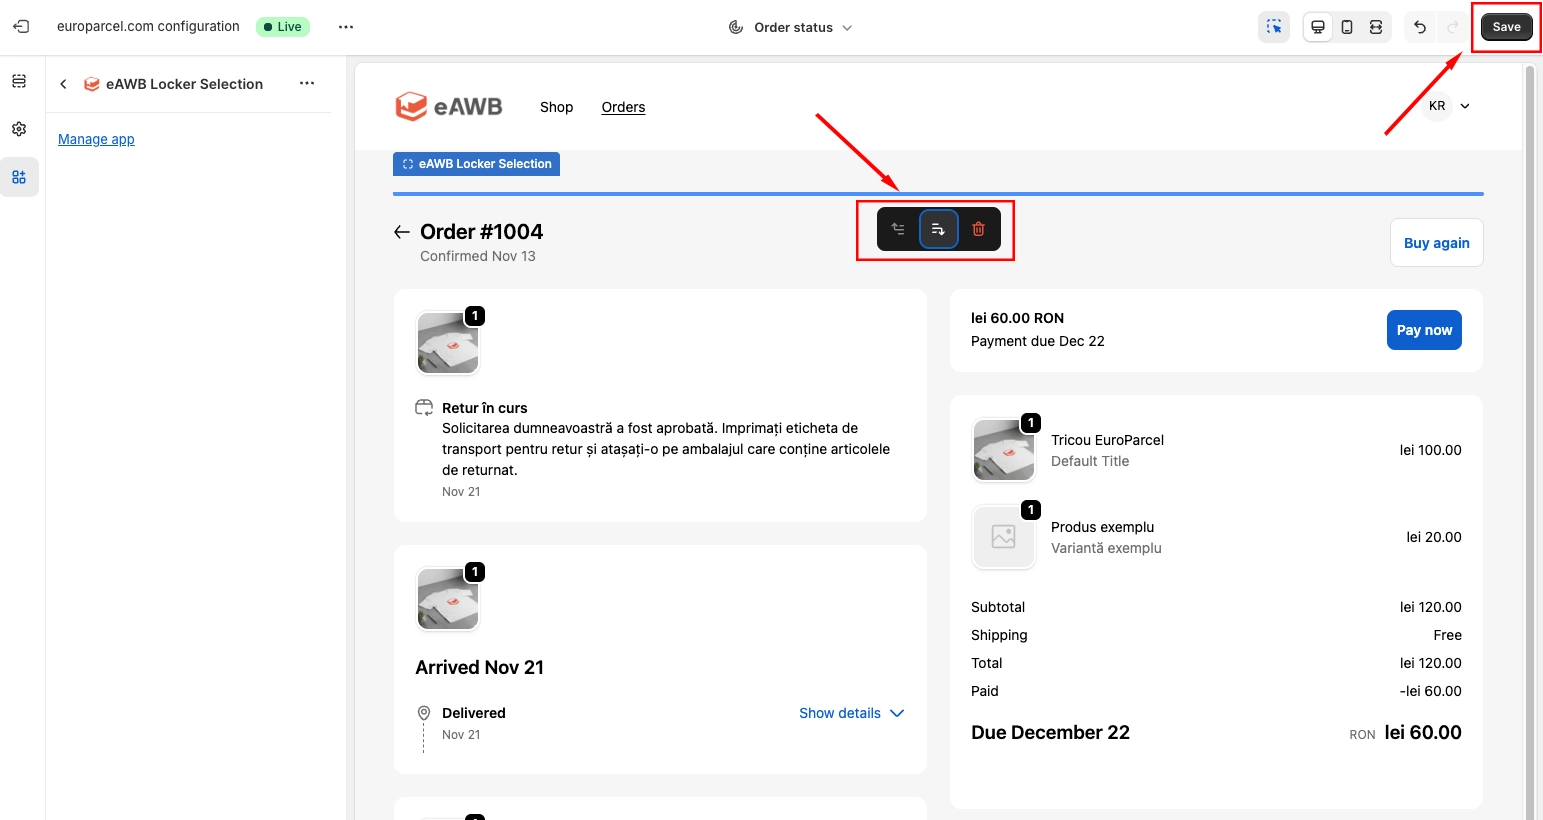
Save the order status page configuration
🎉 Congratulations! Your Shopify store is fully integrated with eAWB
You have successfully installed and configured the eAWB Shopify app. Your customers can now enjoy seamless shipping options, and you can automate your entire fulfillment process directly from your Shopify dashboard.