

PrestaShop Integration

PrestaShop API Setup Guide
Follow these steps to configure your PrestaShop webservice for eAWB integration. Integrate eAWB's shipping services directly into your PrestaShop store and start automating your shipping processes.
Video Tutorial
Watch this step-by-step video guide to help you through the integration process
Download the eAWB PrestaShop Module
Get the official eAWB PrestaShop module. Our module is specifically designed for seamless PrestaShop integration.
Access Advanced Parameters
Navigate to PrestaShop webservice settings
In your PrestaShop admin panel, go to Advanced Parameters (Parametri Avansati) and click on Webservice (Servicii Web).
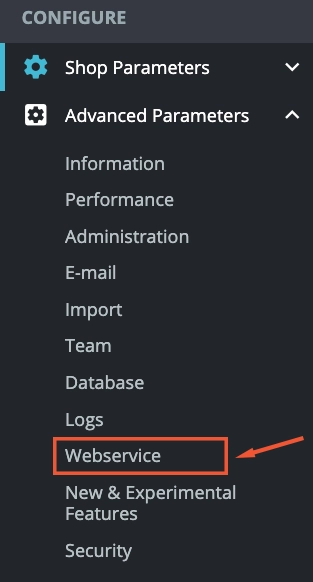
Advanced Parameters menu in PrestaShop admin
Important
Make sure you have administrative privileges to access the Advanced Parameters section.
Enable Webservice
Activate the webservice functionality
Check that the webservice is enabled in your PrestaShop configuration. If not enabled, toggle the switch to activate webservices.
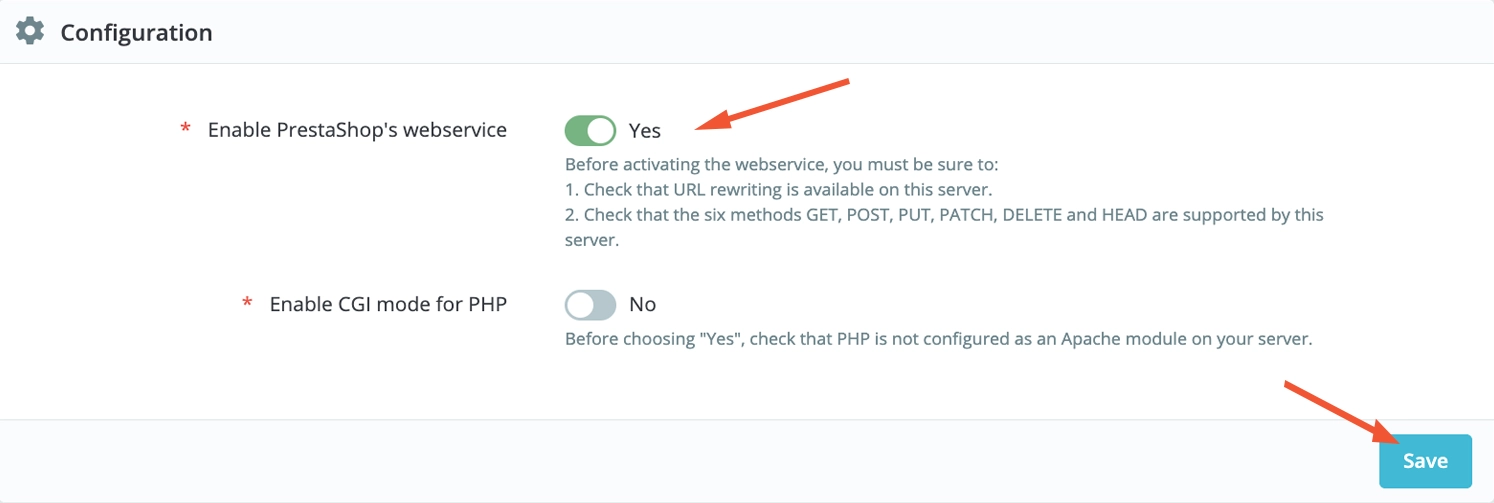
Enable webservice functionality
Tip
Enabling webservices allows external applications to interact with your PrestaShop store via API calls.
Add New Webservice Key
Create a new API key for eAWB integration
In the top right corner of the webservice configuration page, click on "Add new webservice key" (Adauga o noua cheie de serviciu web).
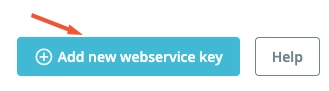
Add new webservice key button
Generate API Key
Create a secure API key
Click on "Generate" (Genereaza) button to automatically create a secure API key. This key will be used to authenticate eAWB services with your PrestaShop store.
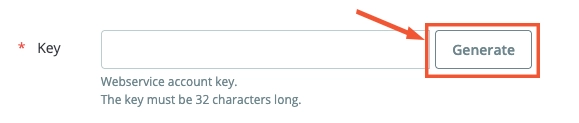
Generate button to create API key
Tip
The generated key is random and secure. You can also create a custom key if needed.
Add Description
Label your API key for future reference
Add a description (Descriere) to help you identify this API key in the future. We recommend using "eAWB" or "eAWB Integration" as the description.
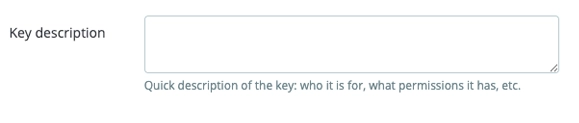
Add description for the API key
Tip
After adding the description, you will need to configure the API permissions in the next step before saving the webservice key.
Configure Permissions and Activate Key
Set API permissions and ensure the key is active
Configure the required permissions for the API key to allow eAWB to access the necessary PrestaShop resources. Make sure to set the key as active to enable the integration.
Select the following permissions (resources):
☑ addresses
☑ countries
☑ currencies
☑ customers
☑ languages
☑ order_carriers
☑ order_histories
☑ order_states
☑ orders
☑ products
☑ states
Set the API key status to Active
Click Save to create the webservice key
Copy the generated API key for use in eAWB configuration
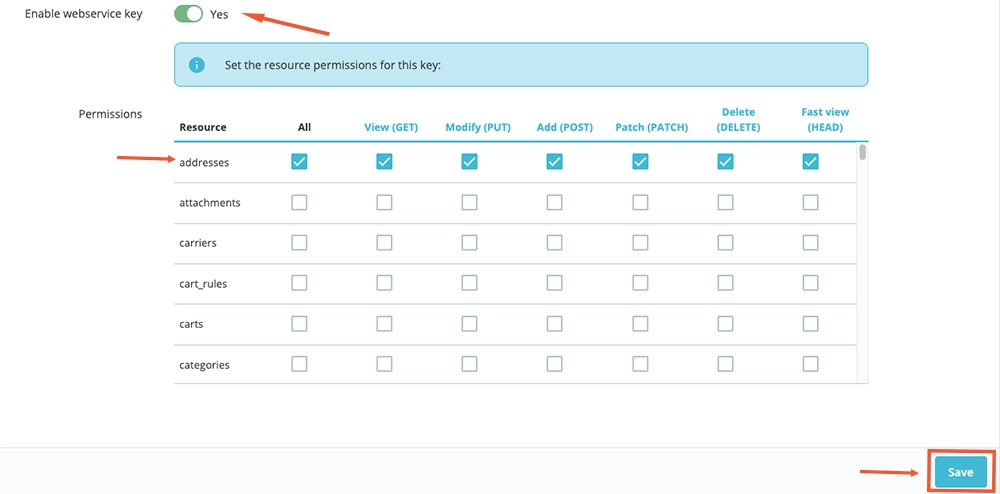
Configure API key permissions and activation
Important
These permissions are essential for eAWB to properly process orders and manage shipping information. Without these permissions, the integration will not function correctly. Keep your API key secure, never share it publicly, and treat it as a password.
Connect to eAWB Account
Complete the integration in your eAWB dashboard
Now return to your eAWB account to complete the integration setup. Navigate to the Integrari (Integrations) section and connect your PrestaShop store.
Log in to your eAWB account
Navigate to the Integrari (Integrations) section
Go to the Integrari tab
Click the Connect button under PrestaShop
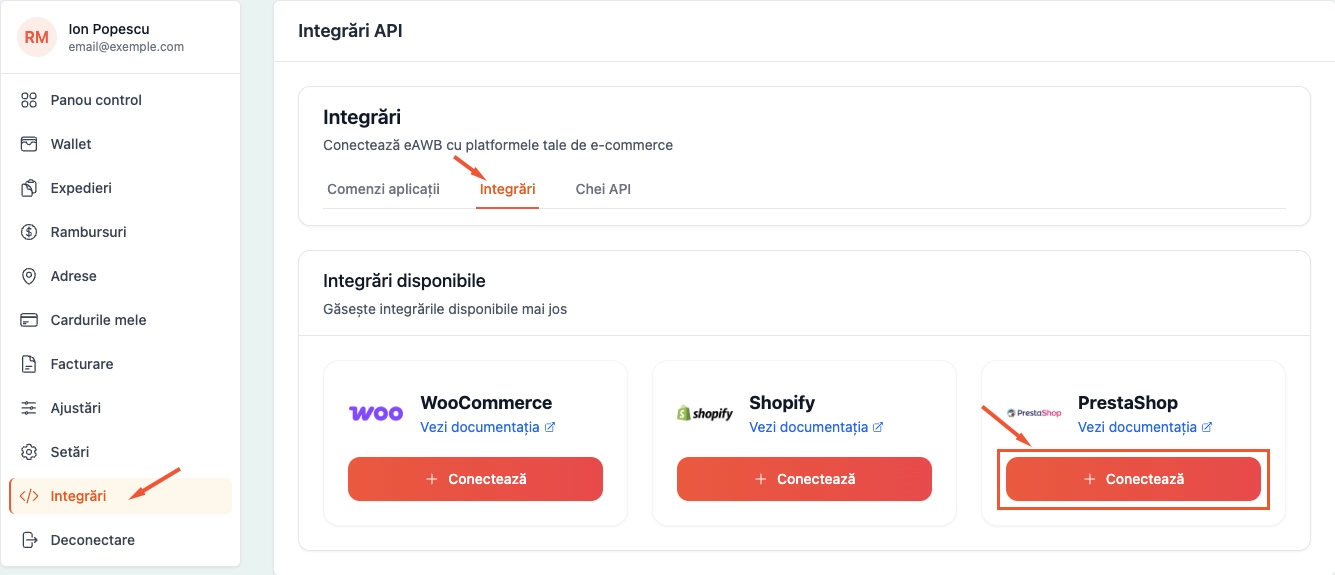
PrestaShop integration in eAWB dashboard
Tip
You will need the API key you generated and copied in the previous step to complete the connection setup.
Complete Integration Setup
Fill in the connection details in the modal
A modal will appear where you need to enter your PrestaShop integration details. Fill in all required information to establish the connection.
Add the name of the integration (e.g., "My PrestaShop Store")
Enter the URL of your eShop (your PrestaShop store URL)
Paste the API key from PrestaShop (generated in Step 6)
Click Conecteaza (Connect) to complete the setup
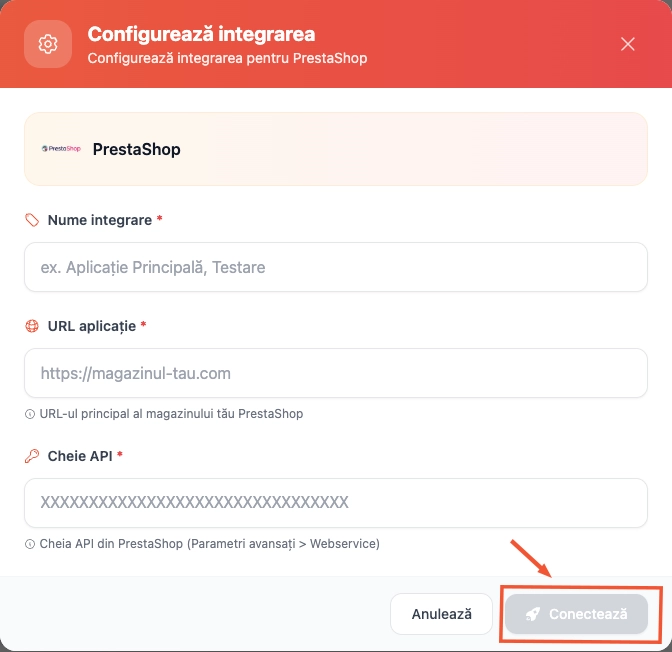
Integration setup modal in eAWB
Important
Make sure all information is accurate before clicking Connect. You can always edit these details later if needed.
Access Integration Settings
Configure your newly connected integration
Now that your PrestaShop store is connected, you need to configure the integration settings. Click on the Setări (Settings) tab under your newly added integration.
Locate your newly added PrestaShop integration
Click on the Setări (Settings) tab under the integration
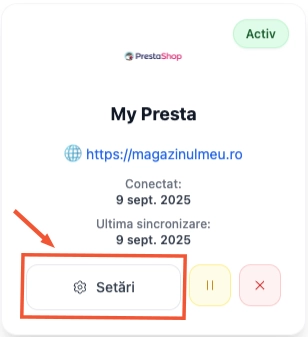
Access integration settings
Tip
The integration settings allow you to customize how orders are processed and AWBs are generated.
Configure Integration Settings
Set up carrier preferences and order synchronization
In the settings modal, you can configure various aspects of your PrestaShop integration to match your business needs.
Set your preferred carrier service for shipments
Configure order statuses for which import of orders will work
Enable or disable Auto sync functionality
Customize the content that will appear on AWBs
Save your settings when complete
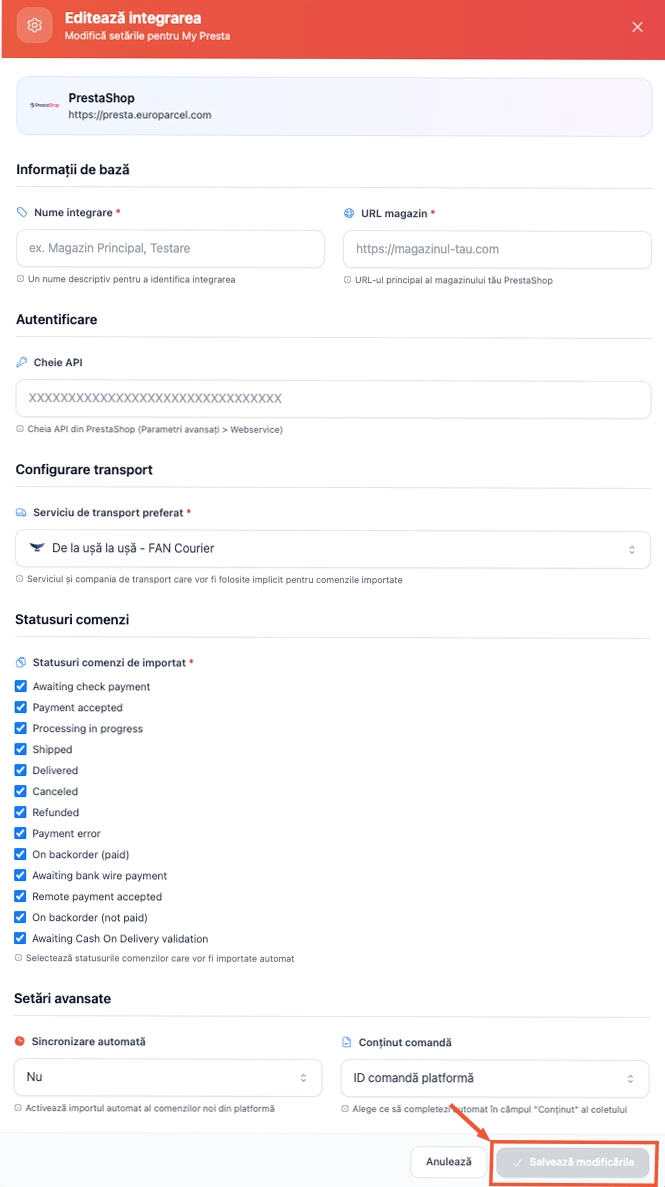
Configure integration preferences
Important
These settings control how your PrestaShop orders are automatically processed and converted into shipping labels through eAWB.
Access Module Management
Navigate to module administration
In your PrestaShop admin panel, go to Module > Administrare module (Module Administration) to access the module management section.
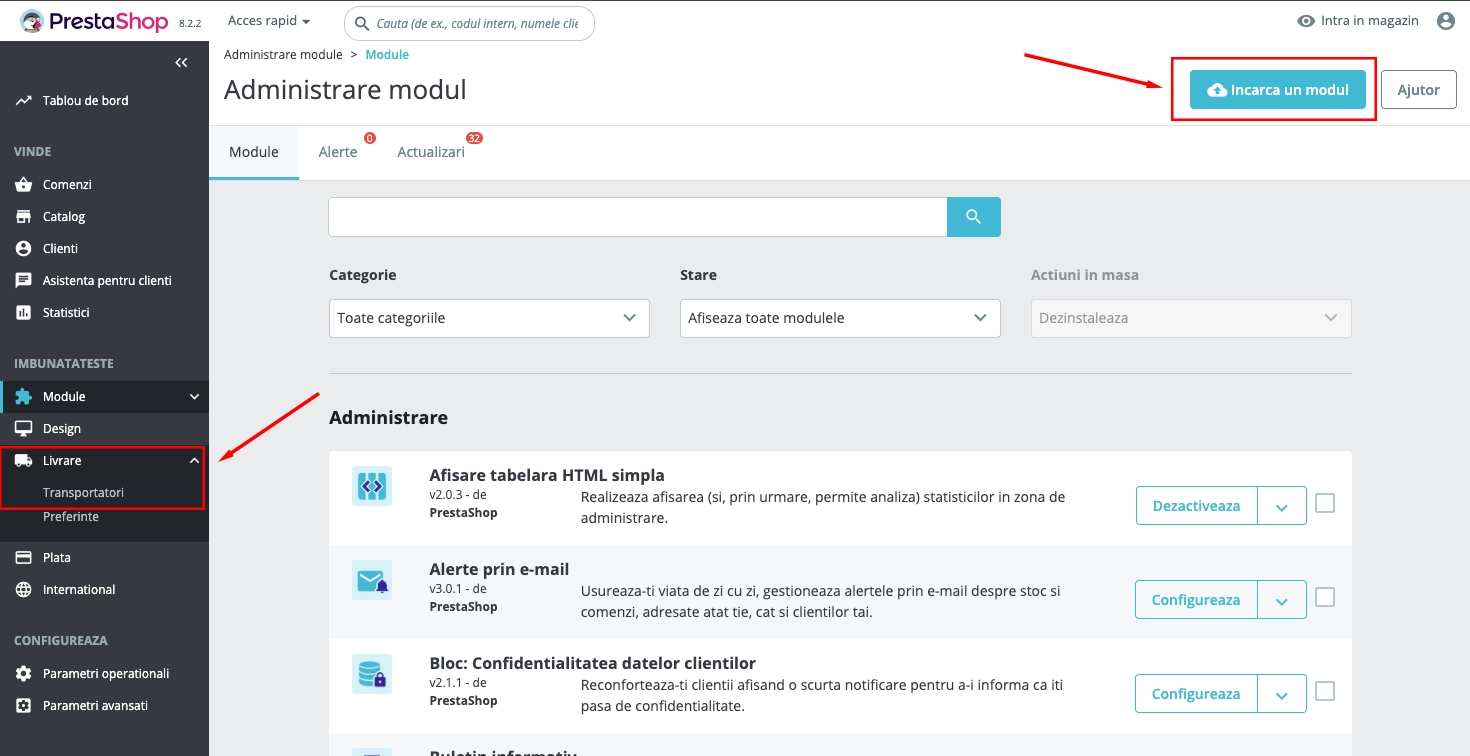
Module Administration in PrestaShop admin
Upload eAWB Module
Install the downloaded module
Click Încarcă acum (Upload now) and upload the `europarcel.zip` file you downloaded in Step 1. This will install the eAWB PrestaShop module.
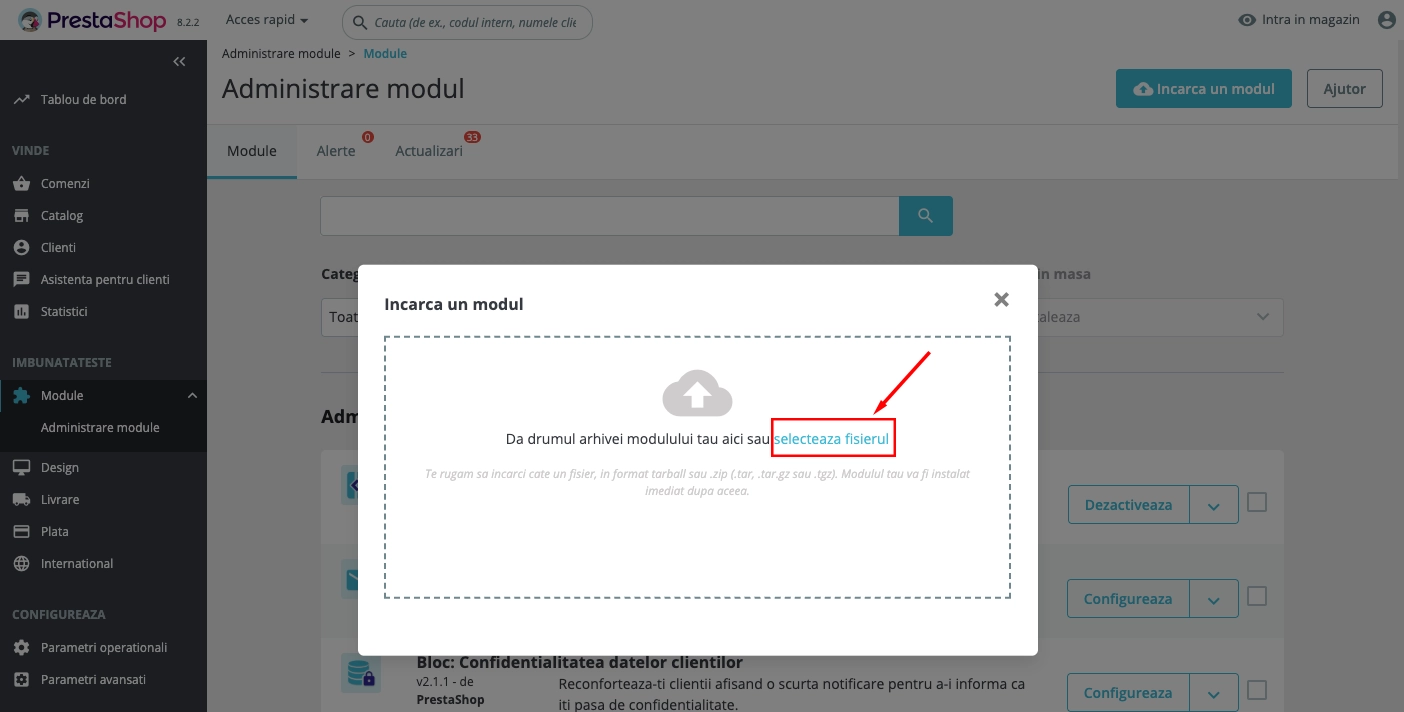
Upload eAWB module
Tip
Make sure you upload the correct zip file that was downloaded from the official eAWB source.
Configure Module
Access module configuration
After successful save, click Configurează (Configure) to set up the module. This will open the module configuration page.
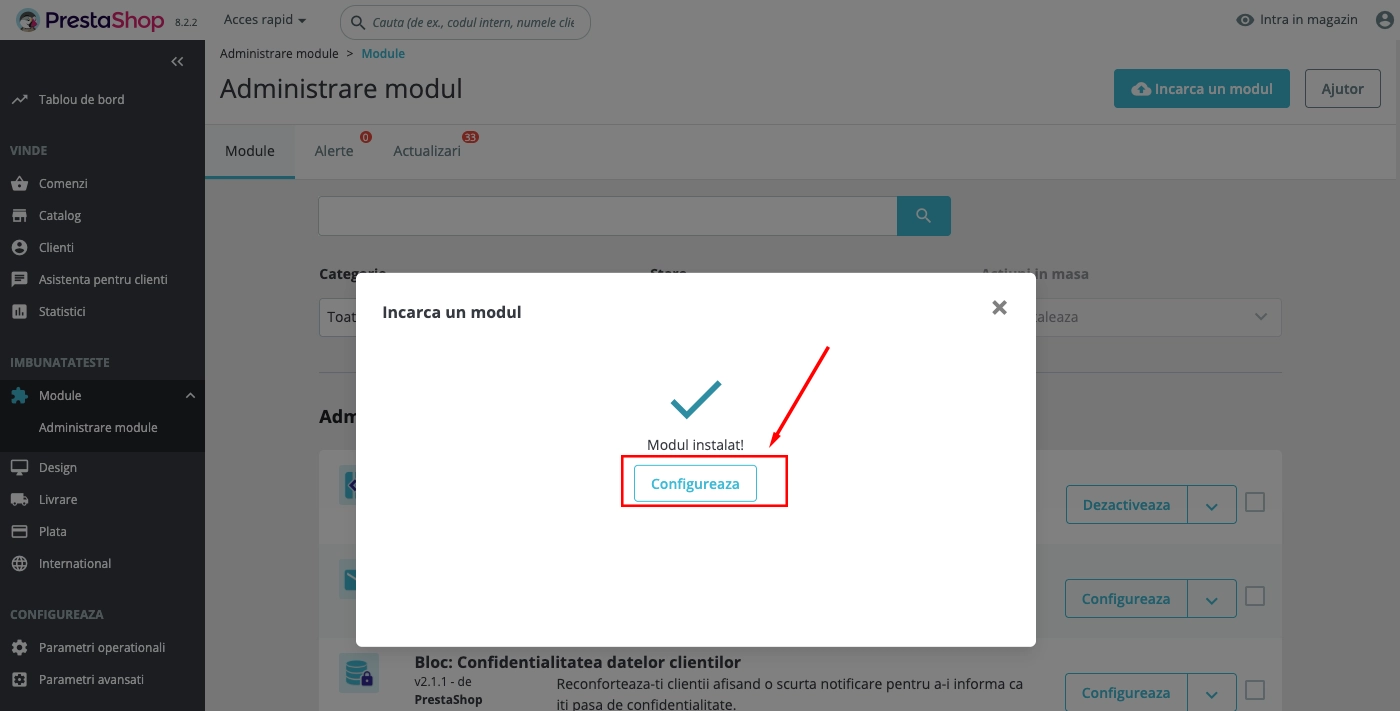
Configure module button
Select Services and Lockers
Configure delivery options
Select your preferred Livrare la adresă (Home Delivery) service and select the lockers you want to show in the map, then click Save to apply your settings.
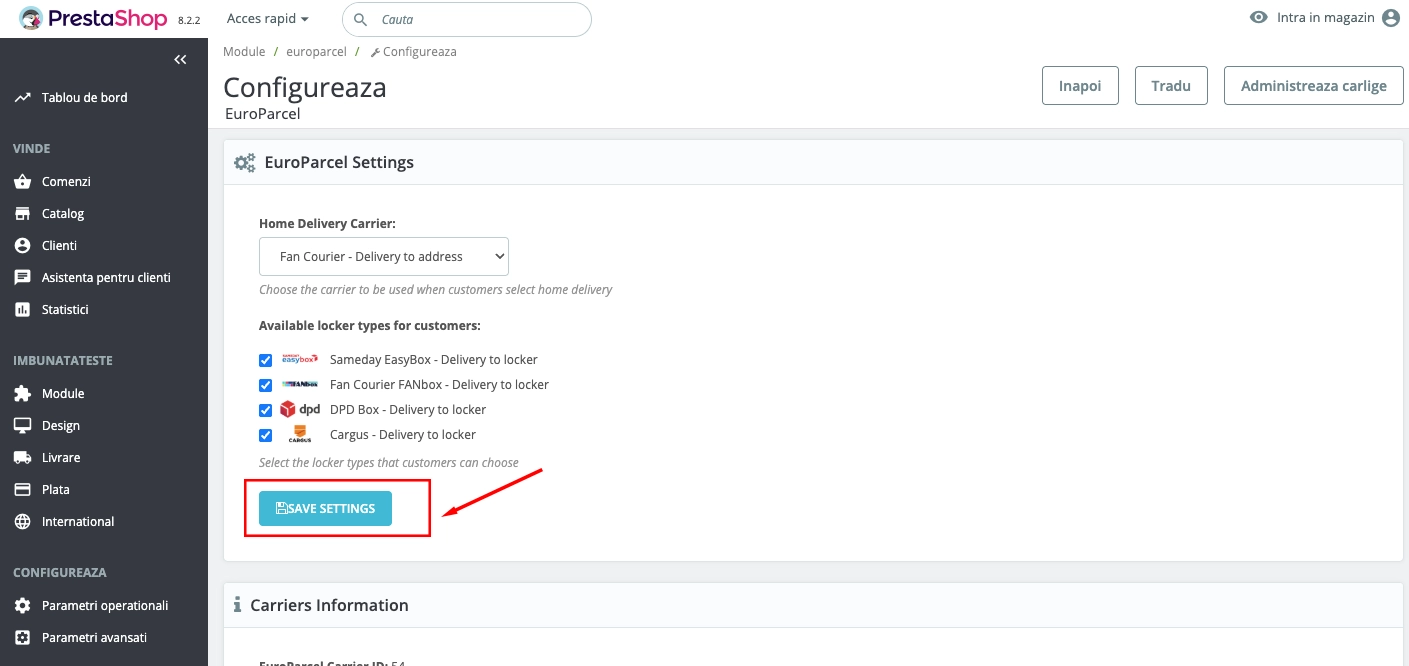
Select services and lockers
Tip
You can select multiple lockers to display on the map for customer selection during checkout.
Access Carrier Settings
Navigate to shipping configuration
Go to Livrare > Transportari (Shipping > Carriers) in the menu and click Modifică (Edit) on EuroParcel - Home Delivery to configure the carrier settings.
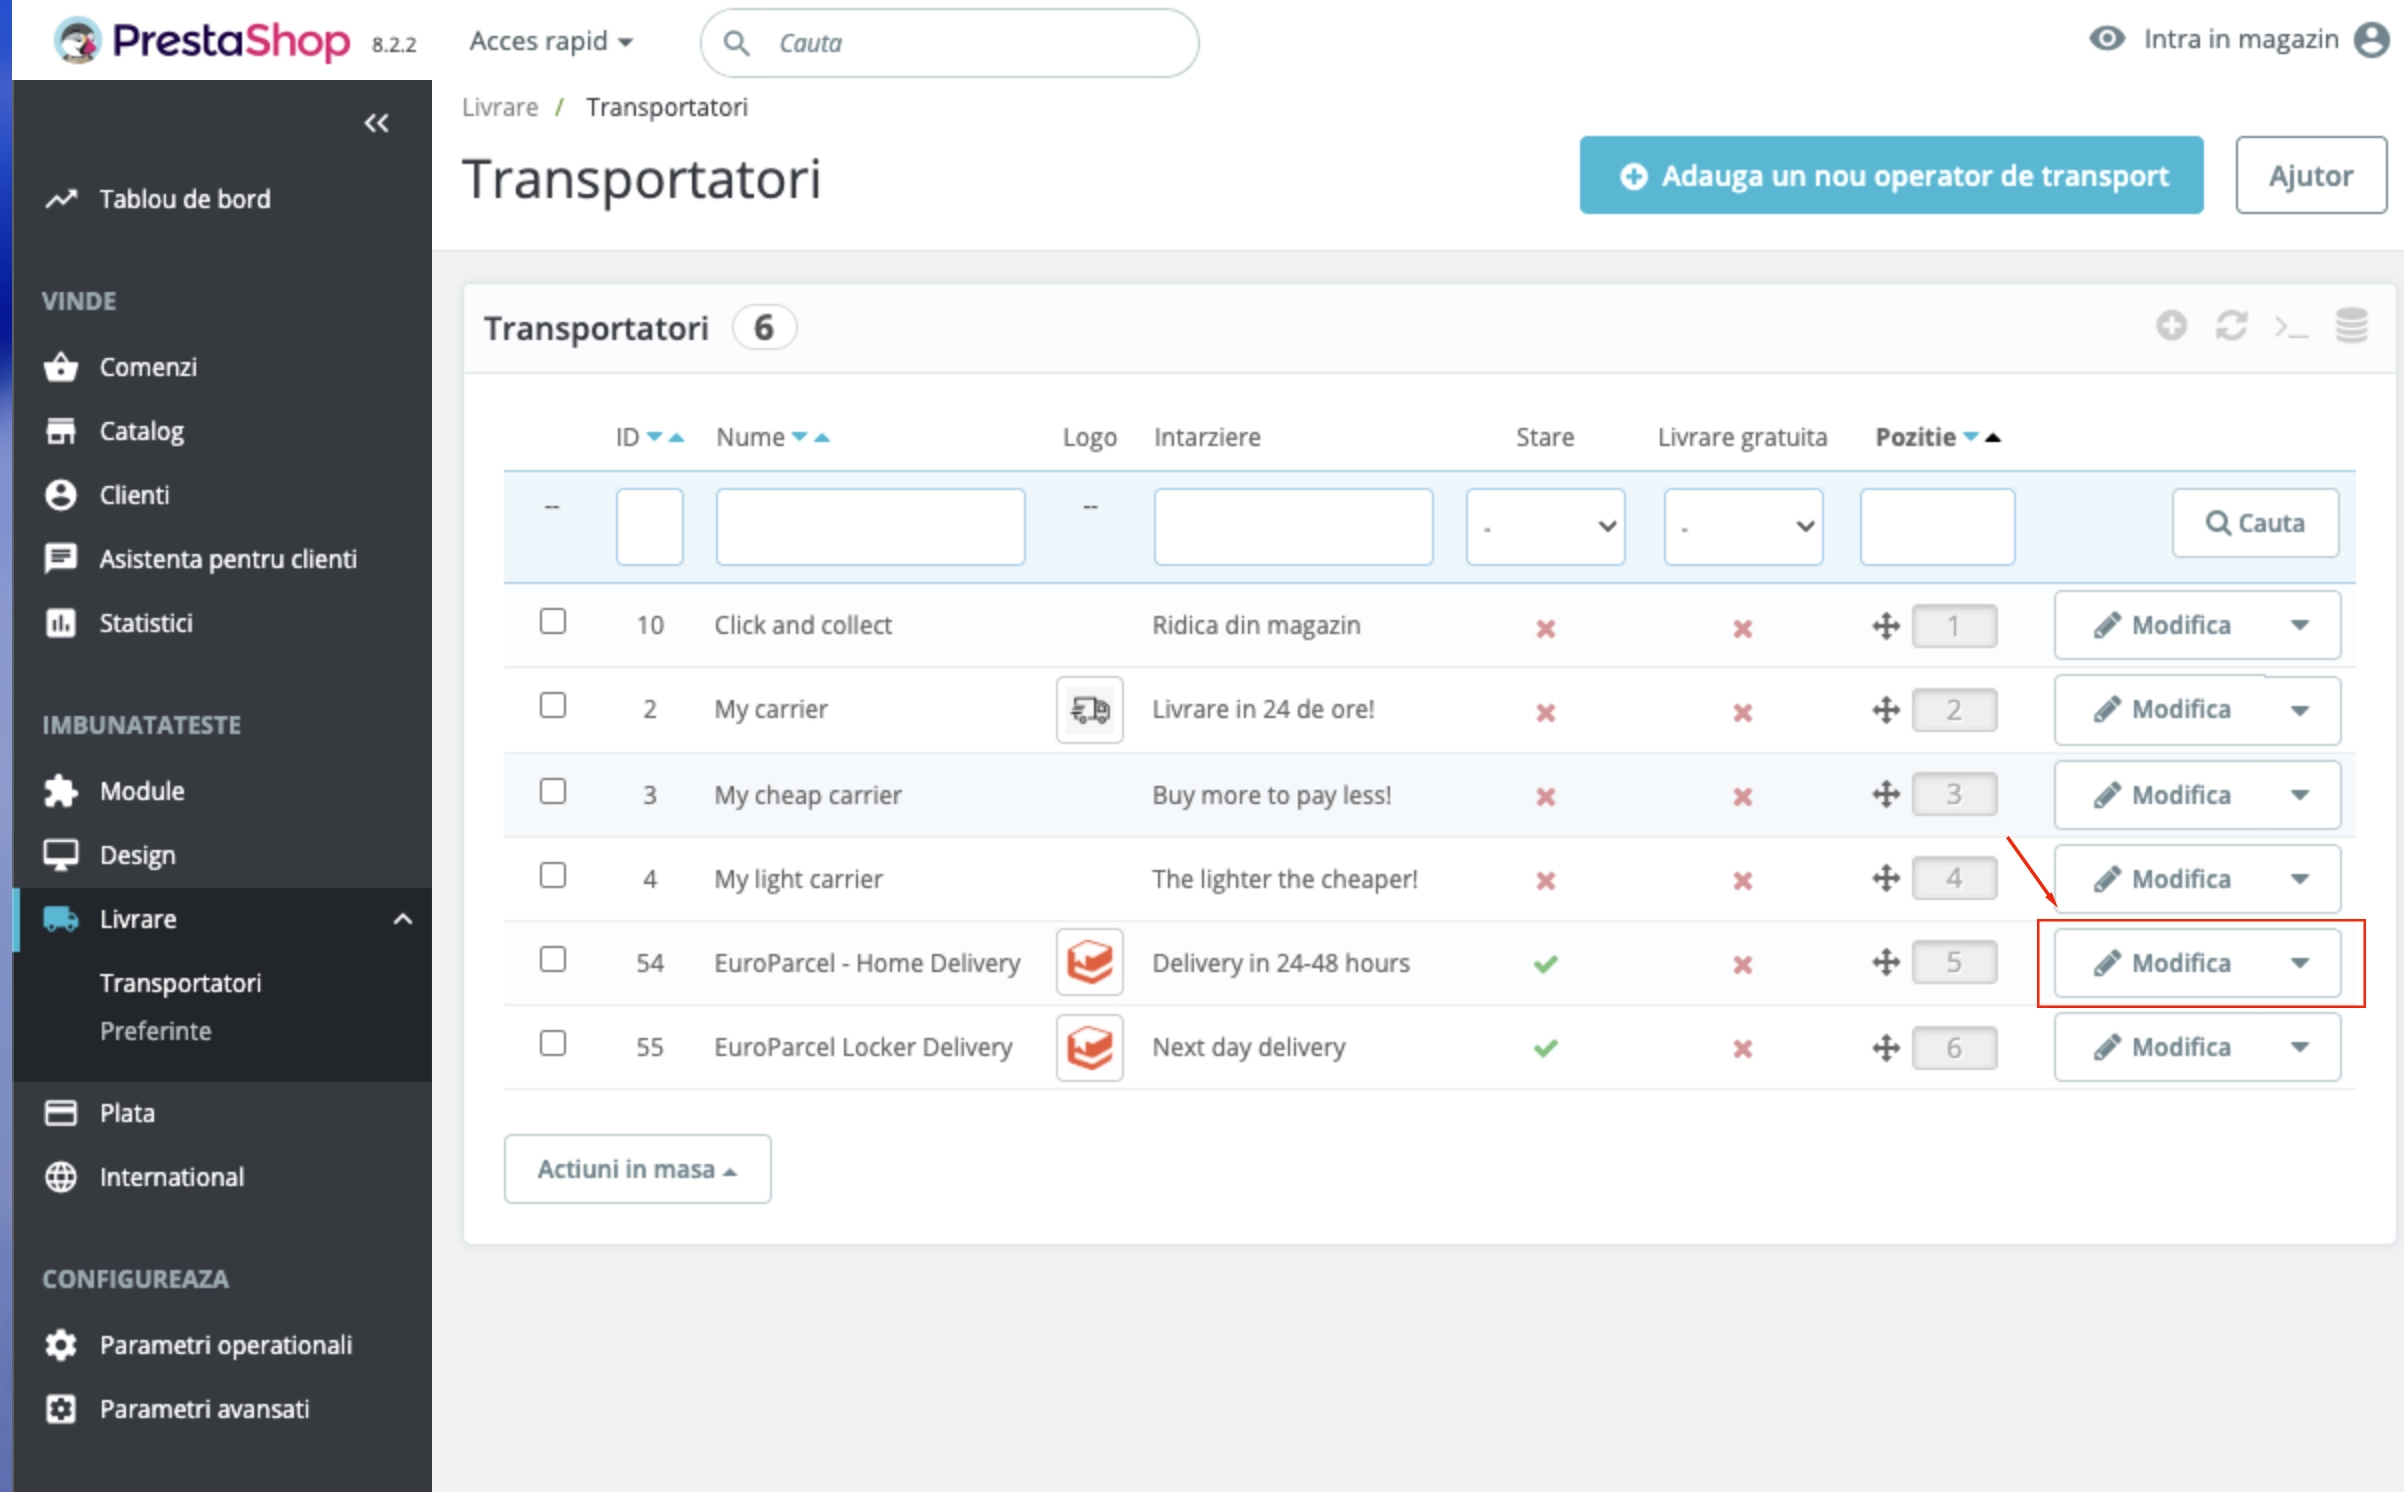
Access carrier settings
Configure Home Delivery Carrier
Set up carrier details
Update Nume transporator (Carrier name) and Timp tranzit (Transit time) according to your preferences, then click Următorul (Next) to proceed.
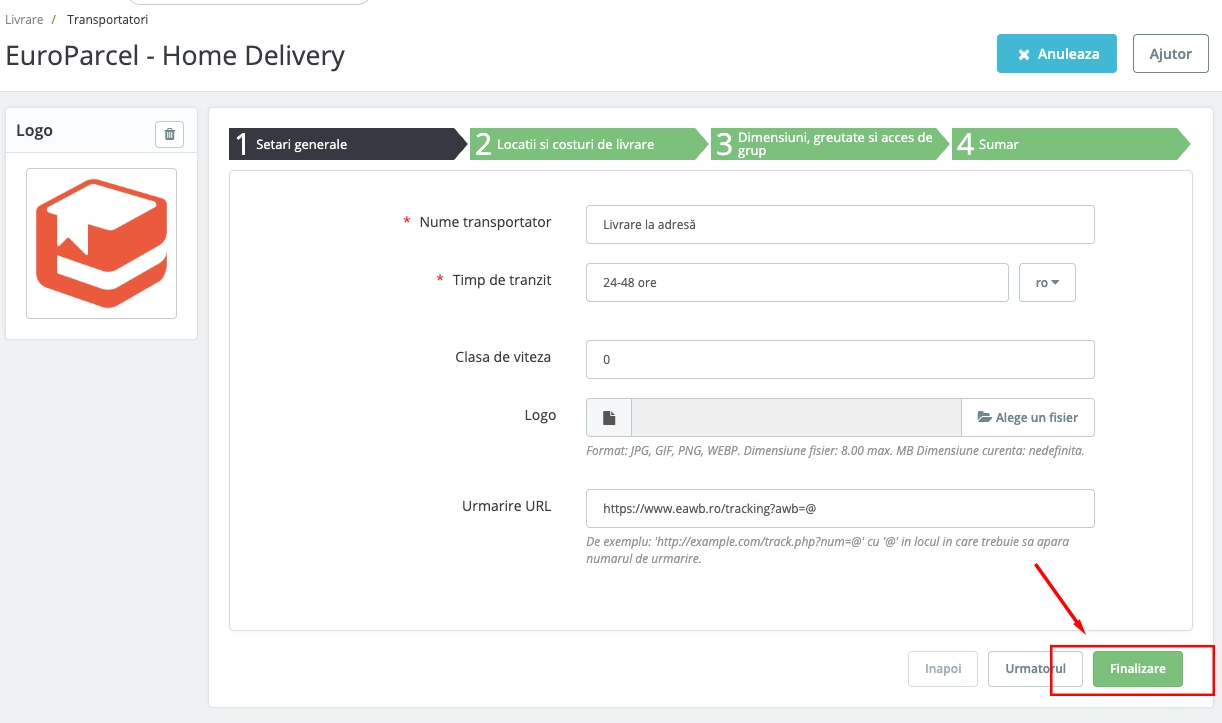
Configure home delivery carrier
Set Home Delivery Shipping Costs
Configure pricing and weights
Update your shipping costs and make sure you set correct weights for each price range. Once configured, click Finalizare (Finish) to save the carrier settings.
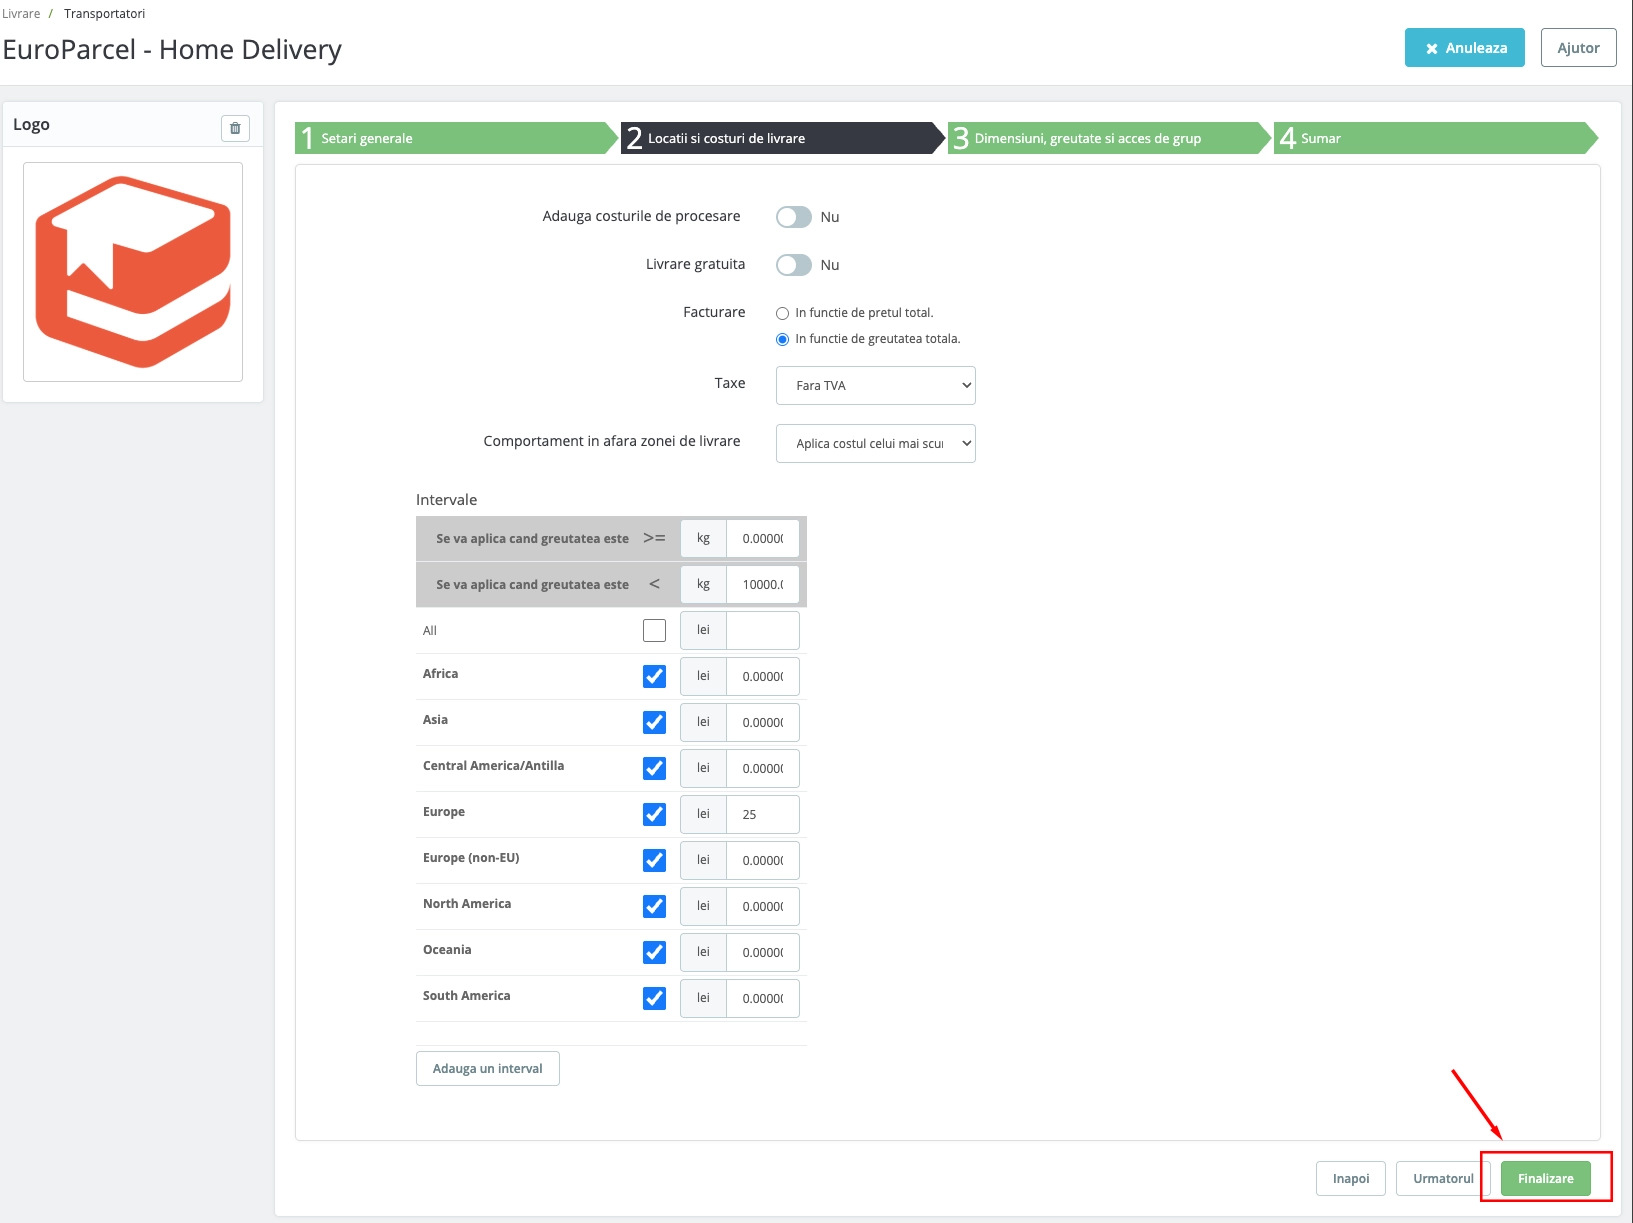
Set home delivery shipping costs
Important
Accurate weight ranges are crucial for correct shipping cost calculations. Make sure the weights match your product catalog.
Edit Locker Delivery Carrier
Access locker delivery carrier settings
From the carriers list, click Modifică (Edit) on EuroParcel Locker Delivery to access the locker delivery carrier configuration.
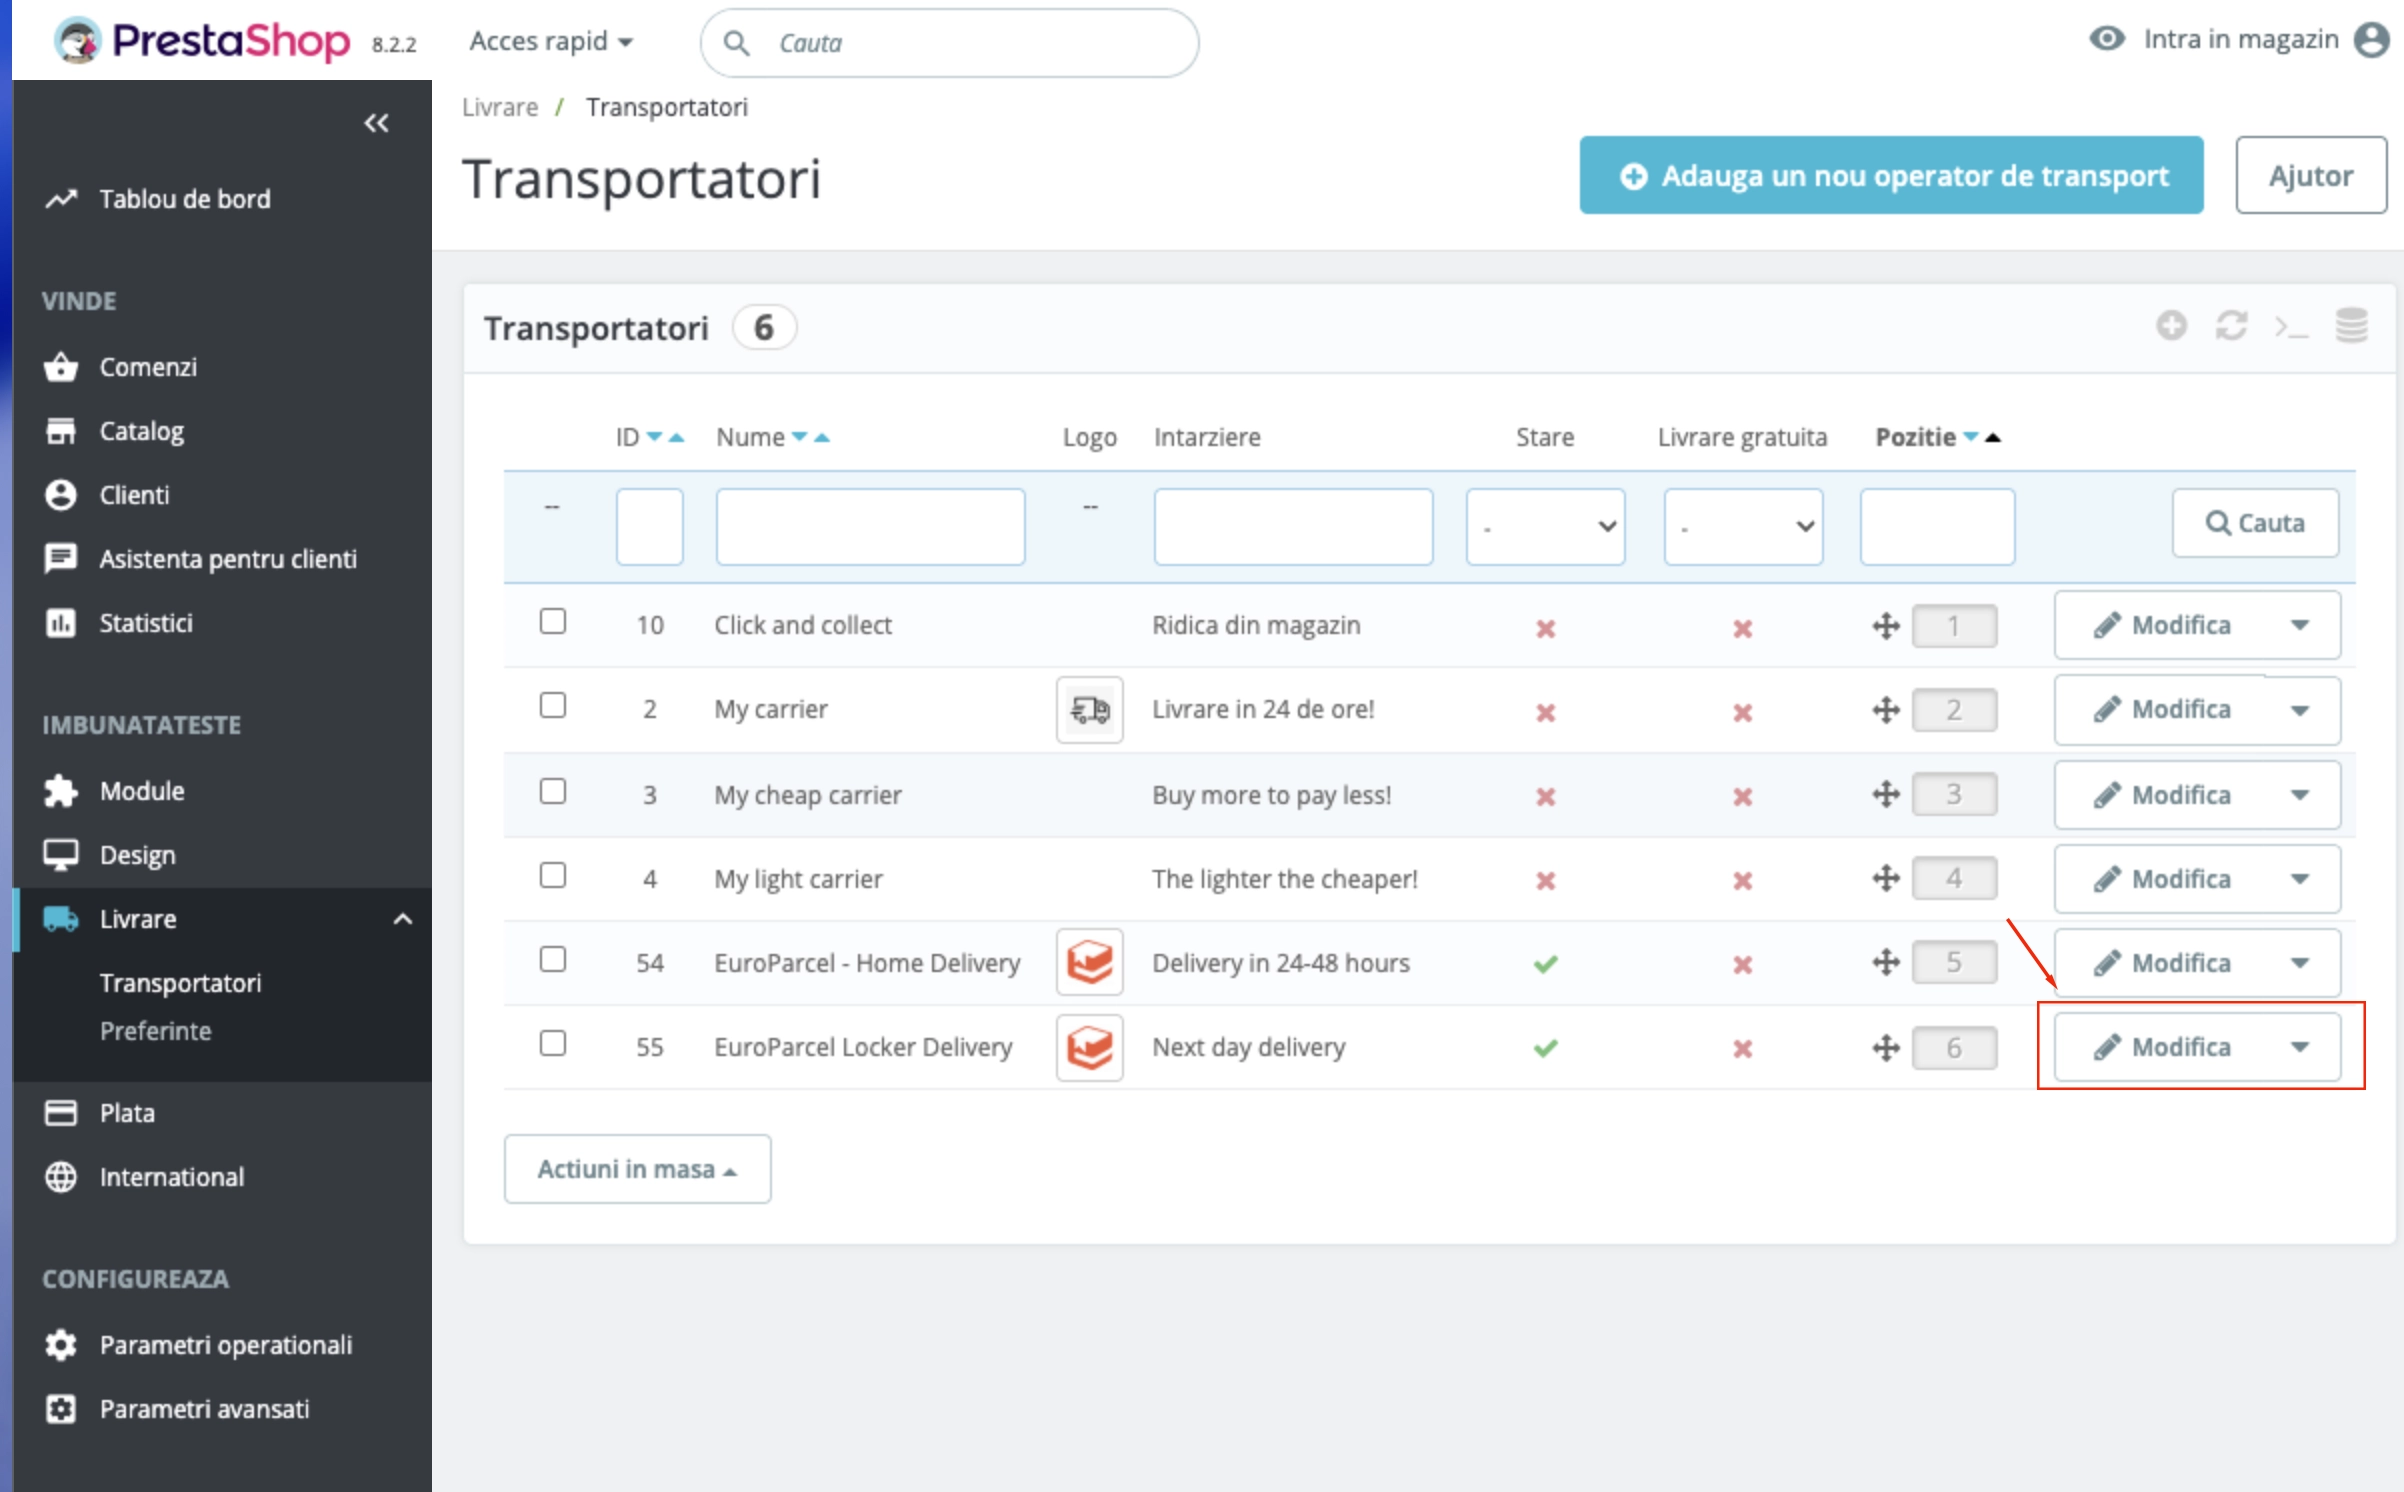
Edit locker delivery carrier
Configure Locker Delivery Carrier
Set up locker delivery details
Update Nume transporator (Carrier name) and Timp tranzit (Transit time) for the locker delivery carrier, then click Următorul (Next) to proceed.
Configure locker delivery carrier
Set Locker Delivery Shipping Costs
Configure locker pricing and weights
Update your shipping costs and make sure you set correct weights for each price range. Once configured, click Finalizare (Finish) to save the locker delivery carrier settings.
Set locker delivery shipping costs
Important
Accurate weight ranges are crucial for correct shipping cost calculations. Make sure the weights match your product catalog.
🎉 Congratulations! Your PrestaShop is ready for eAWB integration
You have successfully configured the webservice API key. You can now use this key to integrate eAWB shipping services into your PrestaShop store.